Compare commits
39 Commits
| Author | SHA1 | Date |
|---|---|---|
 xinxin22 xinxin22
|
84fc747479 | |
|
xinxin22
|
780dd485c9 | |
|
xinxin22
|
ee39dd5520 | |
 gzcx417 gzcx417
|
dab01c6af3 | |
|
gzcx417
|
51a055d6fe | |
|
gzcx417
|
bb750dffc2 | |
|
xinxin22
|
776437aaf2 | |
|
gzcx417
|
18fda45eb8 | |
 zjb
zjb
|
80ebe9b66e | |
|
zjb
|
96fb6543dc | |
|
gzcx417
|
ec3591078d | |
|
gzcx417
|
9027533975 | |
|
zjb
|
50283cd5f0 | |
|
gzcx417
|
0d455dd908 | |
|
zjb
|
7ac044a62d | |
|
zjb
|
88a322b174 | |
|
zjb
|
31e21417d9 | |
|
zjb
|
4078cc27ef | |
|
xinxin22
|
ae860cc891 | |
|
xinxin22
|
e0135b32fa | |
|
xinxin22
|
fc5abcec72 | |
|
zjb
|
0f68758670 | |
|
zjb
|
709d8e439a | |
|
zjb
|
998e5a63cf | |
 wangzeyao wangzeyao
|
cf209cced5 | |
|
wang ze yao
|
a7accacf7c | |
|
gzcx417
|
1cff6b7709 | |
|
zjb
|
0403551a68 | |
|
gzcx417
|
21ed849a2f | |
|
wang ze yao
|
e7e1d9fbfd | |
|
xinxin22
|
10fa3efa1e | |
|
xinxin22
|
bba13d1c4d | |
|
gzcx417
|
3643938238 | |
|
zjb
|
3b476a29d4 | |
|
xinxin22
|
aee75dd74c | |
|
xinxin22
|
6a01e9986f | |
|
xinxin22
|
92afba667c | |
|
xinxin22
|
fb1ac4c373 | |
|
xinxin22
|
30036488d1 |
|
|
@ -16,11 +16,11 @@ workflow:
|
|||
name: docker镜像构建
|
||||
task: docker_image_build@1.6.0
|
||||
input:
|
||||
docker_username: ((nudt_devops.nudt_devops))
|
||||
docker_password: ((nudt_devops.nudt_devops))
|
||||
image_name: '"registry.cn-guangzhou.aliyuncs.com/nudt_devops/gitlink_help_center_group5"'
|
||||
docker_username: ((wangxin22.docker_user))
|
||||
docker_password: ((wangxin22.docker_pswd))
|
||||
image_name: '"crpi-ay17hyefl9pcl3je.cn-hangzhou.personal.cr.aliyuncs.com/wangxin22/gitlink_group9"'
|
||||
image_tag: '"latest"'
|
||||
registry_address: '"registry.cn-guangzhou.aliyuncs.com"'
|
||||
registry_address: '"crpi-ay17hyefl9pcl3je.cn-hangzhou.personal.cr.aliyuncs.com"'
|
||||
docker_file: '"Dockerfile"'
|
||||
docker_build_path: '"."'
|
||||
workspace: git_clone_0.git_path
|
||||
|
|
@ -32,9 +32,9 @@ workflow:
|
|||
name: git clone
|
||||
task: git_clone@1.2.9
|
||||
input:
|
||||
username: ((ganshihao21.ganshihao21_user))
|
||||
password: ((ganshihao21.ganshihao21))
|
||||
remote_url: '"https://gitlink.org.cn/shuaihao/gitlink_help_center.git"'
|
||||
username: ((wangxin22.user))
|
||||
password: ((wangxin22.pswd))
|
||||
remote_url: '"https://gitlink.org.cn/xinxin22/gitlink_help_center.git"'
|
||||
ref: '"refs/heads/master"'
|
||||
commit_id: '""'
|
||||
depth: 1
|
||||
|
|
@ -44,19 +44,15 @@ workflow:
|
|||
name: ssh执行命令
|
||||
task: ssh_cmd@1.1.1
|
||||
input:
|
||||
ssh_pass: ((ssh_key.ssh_key))
|
||||
ssh_ip: '"47.96.164.145"'
|
||||
ssh_pass: ((wangxin22.ssh_pswd))
|
||||
ssh_ip: '"47.96.137.102"'
|
||||
ssh_port: '"22"'
|
||||
ssh_user: '"root"'
|
||||
ssh_cmd: '"docker stop ghc_group5 && docker rm ghc_group5 && docker pull
|
||||
registry.cn-guangzhou.aliyuncs.com/nudt_devops/gitlink_help_center_group5:latest
|
||||
&& docker run -d -p 3000:3000 --name ghc_group5
|
||||
registry.cn-guangzhou.aliyuncs.com/nudt_devops/gitlink_help_center_group5:latest"'
|
||||
ssh_cmd: '"docker stop wx_group8 ; docker rm wx_group8 ; docker pull crpi-ay17hyefl9pcl3je.cn-hangzhou.personal.cr.aliyuncs.com/wangxin22/gitlink_group9:latest ; docker run -d -p 3000:3000 --name wx_group8 crpi-ay17hyefl9pcl3je.cn-hangzhou.personal.cr.aliyuncs.com/wangxin22/gitlink_group9:latest"'
|
||||
needs:
|
||||
- docker_image_build_0
|
||||
- ref: end
|
||||
name: 结束
|
||||
task: end
|
||||
needs:
|
||||
- ssh_cmd_0
|
||||
|
||||
- ssh_cmd_0
|
||||
|
|
@ -1,62 +0,0 @@
|
|||
version: 2
|
||||
name: 未命名项目
|
||||
description: ""
|
||||
global:
|
||||
concurrent: 1
|
||||
trigger:
|
||||
webhook: gitlink@1.0.0
|
||||
event:
|
||||
- ref: push
|
||||
ruleset-operator: AND
|
||||
workflow:
|
||||
- ref: start
|
||||
name: 开始
|
||||
task: start
|
||||
- ref: git_clone_0
|
||||
name: git clone
|
||||
task: git_clone@1.2.9
|
||||
input:
|
||||
username: ((ganshihao21.ganshihao21_user))
|
||||
password: ((ganshihao21.ganshihao21))
|
||||
remote_url: '"https://gitlink.org.cn/ganshihao21/reposync.git"'
|
||||
ref: '"refs/heads/master"'
|
||||
commit_id: '""'
|
||||
depth: 1
|
||||
needs:
|
||||
- start
|
||||
- ref: docker_image_build_0
|
||||
name: docker镜像构建
|
||||
task: docker_image_build@1.6.0
|
||||
input:
|
||||
docker_username: ((nudt_devops.nudt_devops))
|
||||
docker_password: ((nudt_devops.nudt_devops))
|
||||
image_name: '"registry.cn-guangzhou.aliyuncs.com/nudt_devops/reposync_group5"'
|
||||
image_tag: '"latest"'
|
||||
registry_address: '"registry.cn-guangzhou.aliyuncs.com"'
|
||||
docker_file: '"Dockerfile"'
|
||||
docker_build_path: '"."'
|
||||
workspace: git_clone_0.git_path
|
||||
image_push: true
|
||||
build_args: '""'
|
||||
needs:
|
||||
- git_clone_0
|
||||
- ref: ssh_cmd_0
|
||||
name: ssh执行命令
|
||||
task: ssh_cmd@1.1.1
|
||||
input:
|
||||
ssh_pass: ((ssh_key.ssh_key))
|
||||
ssh_ip: '"47.96.164.145"'
|
||||
ssh_port: '"22"'
|
||||
ssh_user: '"root"'
|
||||
ssh_cmd: '"docker stop abc_group5 && docker rm abc_group5 && docker pull
|
||||
registry.cn-guangzhou.aliyuncs.com/nudt_devops/reposync_group5:latest &&
|
||||
docker run -d -p 3000:3000 --name abc_group5
|
||||
registry.cn-guangzhou.aliyuncs.com/nudt_devops/reposync_group5:latest"'
|
||||
needs:
|
||||
- docker_image_build_0
|
||||
- ref: end
|
||||
name: 结束
|
||||
task: end
|
||||
needs:
|
||||
- ssh_cmd_0
|
||||
|
||||
|
|
@ -6,5 +6,5 @@ WORKDIR /gitlink_help_center
|
|||
COPY ./ /gitlink_help_center/
|
||||
|
||||
RUN yarn install
|
||||
RUN npm run build -- --locale zh-cn
|
||||
RUN npm run build
|
||||
CMD ["npm", "run", "serve"]
|
||||
|
|
|
|||
|
|
@ -84,8 +84,7 @@
|
|||

|
||||
|
||||
```
|
||||
初始化项目
|
||||
node v20.x npm install --force
|
||||
|
||||
## 前端build成中文 (i18n中可编辑对应中文内容)
|
||||
```
|
||||
npm run build -- --locale zh-CN
|
||||
|
|
|
|||
|
|
@ -1,4 +1,7 @@
|
|||
{
|
||||
"label": "DevOps引擎(Engine)",
|
||||
"position": 6
|
||||
"label": "DevOps引擎",
|
||||
"position": 3,
|
||||
"link": {
|
||||
"type": "generated-index"
|
||||
}
|
||||
}
|
||||
|
|
|
|||
|
|
@ -0,0 +1,85 @@
|
|||
# CI/CD配置文件校验指南
|
||||
|
||||
## 配置文件格式
|
||||
GitLink使用`.gitlink-ci.yml`作为CI/CD配置文件,提交时会自动进行语法校验。
|
||||
|
||||
## 校验规则
|
||||
1. **基本语法检查**
|
||||
- YAML格式必须正确
|
||||
- 缩进必须使用2个空格
|
||||
- 不允许使用tab字符
|
||||
|
||||
2. **必需字段验证**
|
||||
```yaml
|
||||
version: 1.0 # 必填,指定配置文件版本
|
||||
stages: # 必填,定义流水线阶段
|
||||
jobs: # 必填,定义具体任务
|
||||
```
|
||||
|
||||
3. **字段类型验证**
|
||||
- `version`: 字符串
|
||||
- `stages`: 数组
|
||||
- `jobs`: 对象
|
||||
- `script`: 字符串数组
|
||||
|
||||
4. **环境变量格式**
|
||||
- 变量名只能包含字母、数字和下划线
|
||||
- 变量名必须以字母开头
|
||||
|
||||
## 错误提示说明
|
||||
当配置文件存在问题时,系统会在以下位置显示错误信息:
|
||||
1. 提交时的即时反馈
|
||||
2. CI/CD页面的构建日志
|
||||
3. 合并请求的状态检查
|
||||
|
||||
## 常见错误及解决方案
|
||||
1. **缩进错误**
|
||||
```yaml
|
||||
# 错误示例
|
||||
jobs:
|
||||
build: # 应该缩进2个空格
|
||||
script:
|
||||
- echo "Hello"
|
||||
```
|
||||
|
||||
2. **未定义必需字段**
|
||||
```yaml
|
||||
# 正确示例
|
||||
version: 1.0
|
||||
stages:
|
||||
- build
|
||||
jobs:
|
||||
build:
|
||||
script:
|
||||
- echo "Hello"
|
||||
```
|
||||
|
||||
3. **环境变量格式错误**
|
||||
```yaml
|
||||
# 错误示例
|
||||
variables:
|
||||
1_invalid: "value" # 变量名不能以数字开头
|
||||
```
|
||||
|
||||
## 配置文件模板
|
||||
```yaml
|
||||
version: 1.0
|
||||
stages:
|
||||
- build
|
||||
- test
|
||||
- deploy
|
||||
|
||||
variables:
|
||||
MAVEN_OPTS: "-Dmaven.repo.local=.m2/repository"
|
||||
|
||||
jobs:
|
||||
build:
|
||||
stage: build
|
||||
script:
|
||||
- mvn compile
|
||||
|
||||
test:
|
||||
stage: test
|
||||
script:
|
||||
- mvn test
|
||||
```
|
||||
|
|
@ -9,4 +9,10 @@ sidebar_position: 5
|
|||
|
||||
编辑流水线代码,其流水线名称描述、触发器、全局参数、执行串行/并发和流水线编排等概念同图形流水线,具体描述如下:
|
||||
|
||||

|
||||

|
||||
|
||||
# YAML校验规则
|
||||
提交.gitlink-ci.yml时会自动校验以下内容:
|
||||
- 必须包含version字段
|
||||
- 节点名称不能重复
|
||||
- 每个任务必须指定runner类型
|
||||
|
|
@ -10,4 +10,10 @@ sidebar_position: 1
|
|||
|
||||

|
||||
|
||||
在引擎页面中,用户可以创建和编辑图形流水线或代码流水线、设置外部参数、管理密钥等操作。
|
||||
在引擎页面中,用户可以创建和编辑图形流水线或代码流水线、设置外部参数、管理密钥等操作。
|
||||
|
||||
# 配置文件校验
|
||||
提交.gitlink-ci.yml文件时会自动进行语法校验,系统会提示以下常见错误:
|
||||
- 无效的stage名称
|
||||
- 缺少必填字段
|
||||
- 语法格式错误
|
||||
|
|
@ -0,0 +1,80 @@
|
|||
# GitLink版本功能对比
|
||||
|
||||
## 版本类型
|
||||
|
||||
### 社区版
|
||||
- 完全免费
|
||||
- 开源项目托管
|
||||
- 基础代码托管功能
|
||||
- 基础CI/CD功能
|
||||
- 公共仓库无限制
|
||||
|
||||
### 企业版
|
||||
- 收费服务
|
||||
- 私有部署
|
||||
- 高级功能支持
|
||||
- 专属技术支持
|
||||
- 自定义域名
|
||||
|
||||
## 功能对比表
|
||||
|
||||
| 功能 | 社区版 | 企业版 |
|
||||
|------|--------|--------|
|
||||
| 代码托管 | ✓ | ✓ |
|
||||
| Issue管理 | ✓ | ✓ |
|
||||
| Pull Request | ✓ | ✓ |
|
||||
| WebHook | ✓ | ✓ |
|
||||
| 基础CI/CD | ✓ | ✓ |
|
||||
| Wiki | ✓ | ✓ |
|
||||
| 公共仓库 | 无限制 | 无限制 |
|
||||
| 私有仓库 | 限制数量 | 无限制 |
|
||||
| 存储空间 | 1.2GB/仓库 | 可定制 |
|
||||
| 团队成员 | 限制人数 | 无限制 |
|
||||
| 审计日志 | ✗ | ✓ |
|
||||
| LDAP集成 | ✗ | ✓ |
|
||||
| SSO登录 | ✗ | ✓ |
|
||||
| 高级CI/CD | ✗ | ✓ |
|
||||
| 定制化服务 | ✗ | ✓ |
|
||||
| 专属支持 | ✗ | ✓ |
|
||||
|
||||
## 企业版专属功能
|
||||
|
||||
### 安全与合规
|
||||
- 审计日志
|
||||
- 合规检查
|
||||
- 安全扫描
|
||||
- 漏洞分析
|
||||
|
||||
### 身份认证
|
||||
- LDAP/AD集成
|
||||
- SSO登录
|
||||
- 双因素认证
|
||||
- 访问控制
|
||||
|
||||
### 高级DevOps
|
||||
- 自定义CI/CD
|
||||
- 容器镜像仓库
|
||||
- 制品库
|
||||
- 环境管理
|
||||
|
||||
### 团队协作
|
||||
- 项目组合管理
|
||||
- 高级权限控制
|
||||
- 工作流自动化
|
||||
- 团队数据分析
|
||||
|
||||
## 升级建议
|
||||
1. 适合升级企业版的场景:
|
||||
- 需要私有部署
|
||||
- 要求更高安全性
|
||||
- 需要专业技术支持
|
||||
- 团队规模较大
|
||||
- 需要高级功能
|
||||
|
||||
2. 适合使用社区版的场景:
|
||||
- 个人开发者
|
||||
- 小型团队
|
||||
- 开源项目
|
||||
- 基础代码托管需求00000111
|
||||
- 预算有限
|
||||
123456789101112
|
||||
|
|
@ -10,27 +10,27 @@ sidebar_position: 9
|
|||
|
||||
### **2. WebIDE 入口**
|
||||
从 Gitlink 仓库首页 ,点击Web IDE 按键即可进入
|
||||
<br/>
|
||||
<br/>
|
||||
|
||||
### **3. 分支**
|
||||
支持分支切换:点击左下角分支名即可切换分支。
|
||||
<br/>
|
||||
<br/>
|
||||
|
||||
### **4. 搜索**
|
||||
当前支持 Gitlink 仓库内代码搜索(支持单词匹配和文件过滤)和文件搜索。
|
||||
<br/>
|
||||
<br/>
|
||||
|
||||
### **5. 行高亮**
|
||||
支持单行或多行高亮,点击行号即可高亮行,按住 Shift 可选中连续多行。
|
||||
<br/>
|
||||
<br/>
|
||||
|
||||
### **6. Blame**
|
||||
支持查看单行 blame 信息,hover 后可展示详细信息。
|
||||
<br/>
|
||||
<br/>
|
||||
|
||||
### **7. Graph**
|
||||
支持 graph 视图,可查看分支 commits 历史以及每个 commit 详细文件变更,并支持文件 diff 查看。底部状态栏左下角点击 Git Graph 或在命令面板输入 View Git Graph,即可打开 Git Graph 视图。
|
||||
<br/>
|
||||
<br/>
|
||||
|
||||
### **8. WebSCM**
|
||||
可以在极速版新建分支,修改代码后在 SCM 面板看到变更文件列表,写完 commit message 后提交到 Gitlink 上。如果想快速修改一些文件可以不用在本地修改,直接通过极速版修改代码一次性提交。
|
||||
|
|
@ -38,4 +38,4 @@ sidebar_position: 9
|
|||
### **9. 代码在线运行**
|
||||
● 集成了基于 skypack 的更加轻量的 CodeSwing 插件,可以在极速版去运行前端代码。
|
||||
● 集成了基于 Pyodide 的 Code-Runner-For-Web 插件,可以将 Python 的运行搬到浏览器上。
|
||||
<br/>
|
||||
<br/>
|
||||
|
|
|
|||
|
|
@ -3,24 +3,24 @@ sidebar_label: 'Webhook'
|
|||
sidebar_position: 8
|
||||
---
|
||||
### **1. Webhook模块入口**
|
||||
在项目主页,点击“仓库设置”按键,再点击“网络钩子”按键,即可进入仓库的Webhook模块。
|
||||
<br/>
|
||||
在项目主页,点击"仓库设置"按键,再点击"网络钩子"按键,即可进入仓库的Webhook模块。
|
||||
<br/>
|
||||
|
||||
### **2. 添加Webhook**
|
||||
单击“添加Webhook”按键,可进入配置Webhook页面:
|
||||
单击"添加Webhook"按键,可进入配置Webhook页面:
|
||||
|
||||
<br/>
|
||||
<br/>
|
||||
<br/>
|
||||
<br/>
|
||||
|
||||
### **3. 编辑Webhook**
|
||||
添加Webhook后,如下图所示,可以通过点击右侧”编辑“按键来对每个Webhook进行编辑操作。
|
||||
添加Webhook后,如下图所示,可以通过点击右侧"编辑"按键来对每个Webhook进行编辑操作。
|
||||
|
||||
<br/>
|
||||
<br/>
|
||||
|
||||
### **4. 删除Webhook**
|
||||
添加Webhook后,如下图所示,可以通过点击右侧”删除“按键来对每个Webhook进行删除操作。
|
||||
添加Webhook后,如下图所示,可以通过点击右侧"删除"按键来对每个Webhook进行删除操作。
|
||||
|
||||
<br/>
|
||||
<br/>
|
||||
|
||||
### **5. Webhook支持的事件类型**
|
||||
在GitLink中,Webhook支持的事件类型如下:
|
||||
|
|
|
|||
|
|
@ -1,4 +1,7 @@
|
|||
{
|
||||
"label": "代码库管理",
|
||||
"position": 2
|
||||
"position": 2,
|
||||
"link": {
|
||||
"type": "generated-index"
|
||||
}
|
||||
}
|
||||
|
|
|
|||
|
|
@ -0,0 +1,58 @@
|
|||
# 仓库设置指南
|
||||
|
||||
## 强制推送(Force Push)设置
|
||||
要启用强制推送功能,需要同时满足以下条件:
|
||||
|
||||
1. **用户权限要求**
|
||||
- 必须是仓库管理员
|
||||
- 或具有特定分支的写入权限
|
||||
|
||||
2. **仓库设置要求**
|
||||
- 进入仓库设置页面
|
||||
- 找到"分支保护"设置
|
||||
- 开启`allow_force_push`选项
|
||||
|
||||
### 配置步骤
|
||||
1. 进入仓库设置
|
||||
2. 选择"分支管理"
|
||||
3. 找到目标分支
|
||||
4. 开启"允许强制推送"选项
|
||||
5. 保存设置
|
||||
|
||||
### 注意事项
|
||||
- 强制推送可能会覆盖其他人的提交
|
||||
- 建议在个人分支上使用
|
||||
- 不推荐在主分支上启用
|
||||
- 操作前先备份代码
|
||||
|
||||
## 仓库基本设置
|
||||
|
||||
### 仓库信息
|
||||
- 仓库名称
|
||||
- 仓库描述
|
||||
- 可见性设置
|
||||
- 默认分支
|
||||
|
||||
### 访问控制
|
||||
- 协作者管理
|
||||
- 团队权限
|
||||
- 分支保护规则
|
||||
- SSH密钥管理
|
||||
|
||||
### 功能开关
|
||||
- Issues功能
|
||||
- Wiki功能
|
||||
- Projects功能
|
||||
- Pages服务
|
||||
|
||||
## 存储限制
|
||||
- 免费账户:1.2GB
|
||||
- 单文件上限:100MB
|
||||
- LFS支持:可选开启
|
||||
|
||||
## 高级功能
|
||||
- 仓库迁移
|
||||
- 仓库归档
|
||||
- 仓库模板
|
||||
- WebHook配置
|
||||
- 部署密钥
|
||||
|
|
@ -0,0 +1,70 @@
|
|||
# 仓库模板使用指南
|
||||
|
||||
## 访问模板仓库
|
||||
有两种方式可以访问模板仓库:
|
||||
|
||||
1. **通过URL参数**
|
||||
- 在仓库URL后添加`?template=true`
|
||||
- 例如:`https://gitlink.org/org/repo?template=true`
|
||||
|
||||
2. **通过界面入口**
|
||||
- 点击"新建仓库"按钮
|
||||
- 选择"从模板创建"选项
|
||||
|
||||
## 创建模板仓库
|
||||
|
||||
### 将仓库设置为模板
|
||||
1. 进入仓库设置
|
||||
2. 找到"仓库类型"选项
|
||||
3. 勾选"将此仓库设置为模板"
|
||||
4. 保存设置
|
||||
|
||||
### 模板仓库特性
|
||||
- 不能被直接推送代码
|
||||
- 可以被任何人用作模板
|
||||
- 保持干净的提交历史
|
||||
- 支持自定义初始化配置
|
||||
|
||||
## 使用模板创建仓库
|
||||
|
||||
### 基本步骤
|
||||
1. 访问模板仓库
|
||||
2. 点击"使用此模板"按钮
|
||||
3. 填写新仓库信息
|
||||
4. 选择要包含的分支
|
||||
5. 确认创建
|
||||
|
||||
### 自定义选项
|
||||
- 选择性复制分支
|
||||
- 包含所有标签
|
||||
- 复制Issue模板
|
||||
- 保留提交历史
|
||||
|
||||
## 最佳实践
|
||||
|
||||
### 模板仓库结构
|
||||
```
|
||||
template-repo/
|
||||
├── .gitlink/
|
||||
│ ├── ISSUE_TEMPLATE/
|
||||
│ └── PR_TEMPLATE/
|
||||
├── docs/
|
||||
│ └── README.md
|
||||
├── src/
|
||||
├── tests/
|
||||
├── .gitignore
|
||||
└── README.md
|
||||
```
|
||||
|
||||
### 推荐配置
|
||||
1. 添加详细的README
|
||||
2. 包含必要的配置文件
|
||||
3. 提供示例代码
|
||||
4. 设置Issue和PR模板
|
||||
5. 配置CI/CD模板
|
||||
|
||||
## 注意事项
|
||||
1. 模板仓库应保持最小化
|
||||
2. 定期更新模板内容
|
||||
3. 提供清晰的使用文档
|
||||
4. 避免包含敏感信息
|
||||
|
|
@ -3,9 +3,9 @@ sidebar_label: '仓库设置'
|
|||
sidebar_position: 2
|
||||
---
|
||||
### **1. 仓库设置入口**
|
||||
在仓库主页,点击“仓库设置”按键即可进入仓库设置模块。仓库设置中可以修改项目的基本信息、进行成员管理、配置webhook、设置分支以及安装bot。
|
||||
<br/>
|
||||
在仓库主页,点击"仓库设置"按键即可进入仓库设置模块。仓库设置中可以修改项目的基本信息、进行成员管理、配置webhook、设置分支以及安装bot。
|
||||
<br/>
|
||||
|
||||
### **2. 基本设置**
|
||||
进入仓库设置模块后,单击”基本设置“按键,进入基本设置模块,如下图所示,可以对项目的项目名称、项目标识、项目简介、项目类别、项目语言等基本信息进行修改。单击“转移”按键可以将仓库转移给其他用户和组织,单击“删除本仓库“按键可以删除本仓库。
|
||||
<br/>
|
||||
进入仓库设置模块后,单击"基本设置"按键,进入基本设置模块,如下图所示,可以对项目的项目名称、项目标识、项目简介、项目类别、项目语言等基本信息进行修改。单击"转移"按键可以将仓库转移给其他用户和组织,单击"删除本仓库"按键可以删除本仓库。
|
||||
<br/>
|
||||
|
|
@ -3,9 +3,9 @@ sidebar_label: '代码提交'
|
|||
sidebar_position: 3
|
||||
---
|
||||
### **1. 代码提交入口**
|
||||
用户可以通过项目代码库中间的文件下的“上传文件”按键来上传文件。
|
||||
<br/>
|
||||
用户可以通过项目代码库中间的文件下的"上传文件"按键来上传文件。
|
||||
<br/>
|
||||
|
||||
### **2. 上传文件**
|
||||
进入上传文件页面后,如下图所示,拖动文件,选择提交变更的分支的单击”创建项目“按键即可完成创建。
|
||||
<br/>
|
||||
进入上传文件页面后,如下图所示,拖动文件,选择提交变更的分支的单击"创建项目"按键即可完成创建。
|
||||
<br/>
|
||||
|
|
@ -15,5 +15,8 @@ sidebar_position: 4
|
|||
<br/>
|
||||
|
||||
### **4. 编辑文件**
|
||||
编辑界面右侧有三个按钮,分别是“下载”、“编辑”和“删除”,点击下载即可将文件下载到本地,编辑则可在线编辑文档,删除则将文件从代码库中删除,按钮位置如下图所示。
|
||||
<br/>
|
||||
编辑界面右侧有三个按钮,分别是"下载"、"编辑"和"删除",点击下载即可将文件下载到本地,编辑则可在线编辑文档,删除则将文件从代码库中删除,按钮位置如下图所示。
|
||||
<br/>
|
||||
|
||||
### **5. WebIDE在线编辑**
|
||||
点击文件右侧的"编辑"按钮可直接进入WebIDE界面。
|
||||
|
|
@ -0,0 +1,64 @@
|
|||
# 合并请求使用指南
|
||||
|
||||
## 创建合并请求
|
||||
|
||||
### 基本步骤
|
||||
1. 进入源分支
|
||||
2. 点击"新建合并请求"
|
||||
3. 选择目标分支
|
||||
4. 填写标题和描述
|
||||
5. 提交合并请求
|
||||
|
||||
## 审查合并请求
|
||||
|
||||
### 代码审查
|
||||
1. 查看变更文件
|
||||
2. 添加行内评论
|
||||
3. 提交整体评审意见
|
||||
4. 设置审查状态
|
||||
|
||||
### 合并操作
|
||||
1. 确保所有检查通过
|
||||
2. 滚动到评论框下方
|
||||
3. 找到"合并"按钮(位于评论区下方)
|
||||
4. 选择合并方式
|
||||
- 普通合并
|
||||
- 压缩合并
|
||||
- 变基合并
|
||||
|
||||
## 合并选项说明
|
||||
|
||||
### 普通合并
|
||||
- 保留完整提交历史
|
||||
- 创建合并提交
|
||||
- 适合功能分支合并
|
||||
|
||||
### 压缩合并
|
||||
- 将所有提交压缩为一个
|
||||
- 保持主分支历史整洁
|
||||
- 适合bug修复合并
|
||||
|
||||
### 变基合并
|
||||
- 重放所有提交
|
||||
- 形成线性历史
|
||||
- 适合长期维护分支
|
||||
|
||||
## 最佳实践
|
||||
|
||||
### 提交合并请求前
|
||||
1. 确保本地测试通过
|
||||
2. 更新分支到最新
|
||||
3. 解决冲突
|
||||
4. 编写清晰的描述
|
||||
|
||||
### 审查要点
|
||||
1. 代码质量
|
||||
2. 测试覆盖
|
||||
3. 文档更新
|
||||
4. 性能影响
|
||||
|
||||
### 合并后操作
|
||||
1. 删除源分支
|
||||
2. 更新相关Issue状态
|
||||
3. 部署新版本(如需要)
|
||||
4. 通知相关人员
|
||||
|
|
@ -0,0 +1,38 @@
|
|||
# 账户管理指南
|
||||
|
||||
## 登录方式
|
||||
GitLink提供多种便捷的登录方式:
|
||||
|
||||
### 1. 账号密码登录
|
||||
- 使用注册邮箱/用户名 + 密码登录
|
||||
- 支持记住登录状态
|
||||
|
||||
### 2. 移动端扫码登录
|
||||
1. 在网页端登录界面点击"扫码登录"
|
||||
2. 打开GitLink移动端APP
|
||||
3. 点击APP右上角的扫码图标
|
||||
4. 扫描网页上显示的二维码
|
||||
5. 在手机上确认登录
|
||||
|
||||
### 3. 第三方账号登录
|
||||
- GitHub账号登录
|
||||
- GitLab账号登录
|
||||
- 微信登录
|
||||
|
||||
## 账户安全
|
||||
1. **二次验证**
|
||||
- 支持Google Authenticator
|
||||
- 支持手机验证码
|
||||
|
||||
2. **登录历史**
|
||||
- 查看最近的登录记录
|
||||
- 显示登录IP和设备信息
|
||||
|
||||
3. **访问令牌**
|
||||
- 创建个人访问令牌
|
||||
- 管理令牌权限和有效期
|
||||
|
||||
## 账户限制
|
||||
- 免费账户仓库存储限制:1.2GB
|
||||
- 单个文件大小限制:100MB
|
||||
- API调用频率限制:每小时1000次
|
||||
|
|
@ -0,0 +1,41 @@
|
|||
# 快捷键指南
|
||||
|
||||
## 全局快捷键
|
||||
- `shift + ?`: 显示快捷键帮助面板
|
||||
- `t`: 打开文件快速搜索
|
||||
- `s`: 聚焦搜索框
|
||||
- `g + c`: 跳转到代码页面
|
||||
- `g + i`: 跳转到Issues页面
|
||||
- `g + p`: 跳转到Pull Requests页面
|
||||
|
||||
## 代码浏览
|
||||
- `/`: 在当前仓库中搜索
|
||||
- `l`: 跳转到指定行
|
||||
- `b`: 查看文件历史
|
||||
- `y`: 复制永久链接
|
||||
- `i`: 显示/隐藏差异
|
||||
|
||||
## 代码编辑
|
||||
- `ctrl + s`: 保存更改
|
||||
- `ctrl + f`: 查找
|
||||
- `ctrl + g`: 跳转到行
|
||||
- `ctrl + /`: 注释/取消注释
|
||||
- `ctrl + space`: 触发代码补全
|
||||
|
||||
## Issue和PR
|
||||
- `ctrl + enter`: 提交评论
|
||||
- `r`: 回复
|
||||
- `n`: 创建新Issue
|
||||
- `m`: 设置里程碑
|
||||
- `l`: 添加标签
|
||||
|
||||
## 导航
|
||||
- `h`: 返回首页
|
||||
- `g + n`: 查看通知
|
||||
- `g + d`: 跳转到仪表盘
|
||||
- `g + s`: 跳转到设置
|
||||
|
||||
## 提示
|
||||
1. 在任何页面按下`shift + ?`可以查看当前页面支持的所有快捷键
|
||||
2. 部分快捷键在特定页面才能使用
|
||||
3. 快捷键可能会随平台更新而变化,请以帮助面板显示为准
|
||||
|
|
@ -0,0 +1,29 @@
|
|||
# WebIDE使用指南
|
||||
|
||||
## 概述
|
||||
GitLink提供了强大的在线WebIDE功能,让您无需在本地安装开发环境即可直接在浏览器中编辑和运行代码。
|
||||
|
||||
## 如何访问WebIDE
|
||||
1. 进入任意代码仓库
|
||||
2. 在文件列表界面,点击文件右侧的"编辑"按钮
|
||||
3. 系统将自动打开Cloud IDE界面
|
||||
|
||||
## 主要功能
|
||||
- 在线编辑代码
|
||||
- 实时语法高亮
|
||||
- 代码自动补全
|
||||
- 集成终端
|
||||
- 实时预览
|
||||
- 一键提交变更
|
||||
|
||||
## 快捷键支持
|
||||
WebIDE支持多种快捷键操作以提升开发效率:
|
||||
- `Ctrl + S`: 保存文件
|
||||
- `Ctrl + F`: 在当前文件中搜索
|
||||
- `Ctrl + Shift + F`: 在项目中搜索
|
||||
- `F5`: 运行/调试
|
||||
|
||||
## 注意事项
|
||||
1. 首次打开WebIDE可能需要等待几秒钟进行环境初始化
|
||||
2. 建议使用Chrome或Firefox等现代浏览器以获得最佳体验
|
||||
3. 编辑完成后请及时提交更改
|
||||
|
|
@ -0,0 +1,55 @@
|
|||
# Issue 管理指南
|
||||
|
||||
## Issue自动关闭
|
||||
GitLink支持通过提交信息自动关闭Issue。在提交信息中使用特定关键字,可以自动关闭相关Issue。
|
||||
|
||||
### 支持的关键字
|
||||
- `fix #123`
|
||||
- `fixes #123`
|
||||
- `fixed #123`
|
||||
- `close #123`
|
||||
- `closes #123`
|
||||
- `closed #123`
|
||||
- `resolve #123`
|
||||
- `resolves #123`
|
||||
- `resolved #123`
|
||||
|
||||
### 使用示例
|
||||
```
|
||||
git commit -m "fix #123: 修复了登录按钮无响应的问题"
|
||||
```
|
||||
|
||||
### 多Issue关闭
|
||||
可以在一条提交信息中关闭多个Issue:
|
||||
```
|
||||
git commit -m "fix #123, closes #456: 重构登录模块"
|
||||
```
|
||||
|
||||
### 跨仓库关闭
|
||||
可以通过指定完整路径关闭其他仓库的Issue:
|
||||
```
|
||||
git commit -m "fix organization/repo#123: 修复依赖问题"
|
||||
```
|
||||
|
||||
## 手动关闭Issue
|
||||
1. 打开需要关闭的Issue
|
||||
2. 点击右侧状态下拉菜单
|
||||
3. 选择"关闭Issue"
|
||||
4. 可选:添加关闭原因说明
|
||||
|
||||
## Issue标签管理
|
||||
- 使用合适的标签分类Issue
|
||||
- 可自定义标签颜色和描述
|
||||
- 支持批量编辑标签
|
||||
|
||||
## Issue模板
|
||||
1. 在仓库`.gitlink`目录下创建`ISSUE_TEMPLATE`文件夹
|
||||
2. 添加模板文件(支持markdown格式)
|
||||
3. 新建Issue时可选择使用模板
|
||||
|
||||
## 最佳实践
|
||||
1. 使用清晰的标题描述问题
|
||||
2. 提供完整的复现步骤
|
||||
3. 附上相关的错误日志或截图
|
||||
4. 及时更新Issue状态
|
||||
5. 使用自动关闭语法关联提交和Issue
|
||||
|
|
@ -0,0 +1,84 @@
|
|||
# API使用指南
|
||||
|
||||
## API响应格式
|
||||
|
||||
所有API响应都遵循以下统一格式:
|
||||
|
||||
```json
|
||||
{
|
||||
"code": 200, // 状态码
|
||||
"request_id": "xxx", // 请求唯一标识
|
||||
"data": { // 响应数据
|
||||
// 具体的业务数据
|
||||
}
|
||||
}
|
||||
```
|
||||
|
||||
### 状态码说明
|
||||
- 200: 请求成功
|
||||
- 400: 请求参数错误
|
||||
- 401: 未授权
|
||||
- 403: 禁止访问
|
||||
- 404: 资源不存在
|
||||
- 500: 服务器内部错误
|
||||
|
||||
### 重要说明
|
||||
1. `request_id`字段在每个响应中都会返回,用于问题追踪
|
||||
2. v2版本API已废弃,请使用v3版本
|
||||
3. 所有API调用都需要在Header中携带认证信息
|
||||
|
||||
## API版本说明
|
||||
- v3: 当前稳定版本(推荐使用)
|
||||
- v2: 已废弃,返回410 Gone
|
||||
- v1: 已移除
|
||||
|
||||
## 仓库相关API
|
||||
|
||||
### 获取仓库信息
|
||||
```http
|
||||
GET /api/v3/repos/{owner}/{repo}
|
||||
```
|
||||
|
||||
响应示例:
|
||||
```json
|
||||
{
|
||||
"code": 200,
|
||||
"request_id": "f58c7dd4-9876-4321-abcd-ef1234567890",
|
||||
"data": {
|
||||
"id": 12345,
|
||||
"name": "example-repo",
|
||||
"owner": {
|
||||
"id": 67890,
|
||||
"login": "example-user"
|
||||
}
|
||||
}
|
||||
}
|
||||
```
|
||||
|
||||
### 创建仓库
|
||||
```http
|
||||
POST /api/v3/repos
|
||||
```
|
||||
|
||||
请求体示例:
|
||||
```json
|
||||
{
|
||||
"name": "new-repo",
|
||||
"description": "A new repository",
|
||||
"private": false
|
||||
}
|
||||
```
|
||||
|
||||
## WebHook事件类型
|
||||
支持的事件类型包括:
|
||||
1. `push`: 推送代码时触发
|
||||
2. `pull_request`: PR相关操作触发
|
||||
3. `issue`: Issue相关操作触发
|
||||
4. `release`: 发布版本时触发
|
||||
5. `star`: 加星操作触发
|
||||
6. `fork`: 仓库被fork时触发
|
||||
7. `comment`: 评论相关操作触发
|
||||
8. `repo_analytics`: 仓库统计数据更新时触发
|
||||
9. `wiki`: Wiki页面更新时触发
|
||||
10. `member`: 成员变更时触发
|
||||
11. `deploy`: 部署事件触发
|
||||
|
|
@ -1,8 +1,5 @@
|
|||
const lightCodeTheme = require('prism-react-renderer/themes/github');
|
||||
const darkCodeTheme = require('prism-react-renderer/themes/dracula');
|
||||
//Docusaurus v3写法
|
||||
// const { themes } = require('prism-react-renderer');
|
||||
// import { themes } from 'prism-react-renderer';
|
||||
import("@easyops-cn/docusaurus-search-local").PluginOptions;
|
||||
|
||||
/** @type {import('@docusaurus/types').DocusaurusConfig} */
|
||||
|
|
@ -11,14 +8,15 @@ module.exports = {
|
|||
tagline:'gitlink帮助中心',
|
||||
url: 'https://help.gitlink.org.cn/',
|
||||
baseUrl: '/',
|
||||
onBrokenLinks: 'warn',
|
||||
onBrokenMarkdownLinks: 'warn',
|
||||
onBrokenLinks: 'ignore',
|
||||
onBrokenMarkdownLinks: 'ignore',
|
||||
favicon: 'img/icon.ico',
|
||||
organizationName: 'luffyZh', // Usually your GitHub org/user name.
|
||||
projectName: 'docusaurus-luffyzh-website', // Usually your repo name.
|
||||
scripts: [],
|
||||
// stylesheets: ['styles/dark-mode.css'],
|
||||
themeConfig: {
|
||||
|
||||
docs:{
|
||||
sidebar:{
|
||||
hideable:true,
|
||||
|
|
@ -31,7 +29,7 @@ module.exports = {
|
|||
{property:"og:image:alt",content:"GitLink(确实开源)是中国计算机学会CCF官方指定的开源创新服务平台 - Gitlink/forgeplus:GitLink(确实开源)是中国计算机学会CCF官方指定的开源创新服务平台 for gitlink Gitlink/forgeplus for git"}
|
||||
],
|
||||
prism: {
|
||||
theme:lightCodeTheme,
|
||||
theme: lightCodeTheme,
|
||||
darkTheme: darkCodeTheme,
|
||||
},
|
||||
zoom: {
|
||||
|
|
@ -72,26 +70,15 @@ module.exports = {
|
|||
position: 'left',
|
||||
dropdownActiveClassDisabled: true
|
||||
},
|
||||
// {
|
||||
// type: 'localeDropdown',
|
||||
// position: 'right',
|
||||
// },
|
||||
// {
|
||||
// position: 'right',
|
||||
// component:'./src/components/LanguageSwitcher',
|
||||
// label:"language",
|
||||
// to:"#"
|
||||
// items: [
|
||||
// {
|
||||
// label: 'English',
|
||||
// onClick: () => handleLocaleChange('en')
|
||||
// },
|
||||
// {
|
||||
// label: '简体中文',
|
||||
// onClick: () => handleLocaleChange('zh-Hans')
|
||||
// }
|
||||
// ]
|
||||
// }
|
||||
{
|
||||
type: 'localeDropdown',
|
||||
position: 'right',
|
||||
},
|
||||
{
|
||||
to: '/feedback',
|
||||
position: 'right',
|
||||
label: '问题反馈'
|
||||
},
|
||||
// {
|
||||
// href: 'https://github.com/boxyhq',
|
||||
// position: 'right',
|
||||
|
|
@ -173,9 +160,14 @@ module.exports = {
|
|||
'@docusaurus/preset-classic',
|
||||
{
|
||||
docs: {
|
||||
// sidebarPath: require.resolve('./sidebars.js'),
|
||||
sidebarPath: require.resolve('./sidebars.js'),
|
||||
editUrl:'https://www.gitlink.org.cn/Gitlink/gitlink_help_center/tree/master/',
|
||||
routeBasePath: "/",
|
||||
showLastUpdateTime: true,
|
||||
showLastUpdateAuthor: true,
|
||||
sidebarPath: require.resolve('./sidebars.js'),
|
||||
sidebarCollapsible: true,
|
||||
sidebarCollapsed: true,
|
||||
},
|
||||
theme: {
|
||||
customCss: require.resolve('./src/css/custom.css'),
|
||||
|
|
@ -195,6 +187,13 @@ module.exports = {
|
|||
highlightSearchTermsOnTargetPage: true,
|
||||
blogRouteBasePath: "/",
|
||||
explicitSearchResultPath: true,
|
||||
indexDocs: true,
|
||||
indexBlog: false,
|
||||
indexPages: true,
|
||||
docsRouteBasePath: "/",
|
||||
searchResultLimits: 8,
|
||||
searchBarPosition: "right",
|
||||
searchBarShortcutHint: true,
|
||||
// For Docs using Chinese, The `language` is recommended to set to:
|
||||
// ```
|
||||
// language: ["en", "zh"],
|
||||
|
|
@ -204,15 +203,15 @@ module.exports = {
|
|||
],
|
||||
i18n: {
|
||||
defaultLocale: 'zh-cn',
|
||||
locales: ['zh-cn','en'],
|
||||
locales: ['zh-cn', 'en'],
|
||||
localeConfigs: {
|
||||
en: {
|
||||
label: 'English',
|
||||
htmlLang: 'en',
|
||||
},
|
||||
'zh-cn': {
|
||||
label: '简体中文',
|
||||
htmlLang: 'zh-CN',
|
||||
label: '中文',
|
||||
direction: 'ltr',
|
||||
},
|
||||
'en': {
|
||||
label: 'English',
|
||||
direction: 'ltr',
|
||||
},
|
||||
},
|
||||
},
|
||||
|
|
|
|||
|
|
@ -0,0 +1,308 @@
|
|||
{
|
||||
"theme.ErrorPageContent.title": {
|
||||
"message": "This page crashed.",
|
||||
"description": "The title of the fallback page when the page crashed"
|
||||
},
|
||||
"theme.NotFound.title": {
|
||||
"message": "Page Not Found",
|
||||
"description": "The title of the 404 page"
|
||||
},
|
||||
"theme.NotFound.p1": {
|
||||
"message": "We could not find what you were looking for.",
|
||||
"description": "The first paragraph of the 404 page"
|
||||
},
|
||||
"theme.NotFound.p2": {
|
||||
"message": "Please contact the owner of the site that linked you to the original URL and let them know their link is broken.",
|
||||
"description": "The 2nd paragraph of the 404 page"
|
||||
},
|
||||
"theme.admonition.note": {
|
||||
"message": "note",
|
||||
"description": "The default label used for the Note admonition (:::note)"
|
||||
},
|
||||
"theme.admonition.tip": {
|
||||
"message": "tip",
|
||||
"description": "The default label used for the Tip admonition (:::tip)"
|
||||
},
|
||||
"theme.admonition.danger": {
|
||||
"message": "danger",
|
||||
"description": "The default label used for the Danger admonition (:::danger)"
|
||||
},
|
||||
"theme.admonition.info": {
|
||||
"message": "info",
|
||||
"description": "The default label used for the Info admonition (:::info)"
|
||||
},
|
||||
"theme.admonition.caution": {
|
||||
"message": "caution",
|
||||
"description": "The default label used for the Caution admonition (:::caution)"
|
||||
},
|
||||
"theme.BackToTopButton.buttonAriaLabel": {
|
||||
"message": "Scroll back to top",
|
||||
"description": "The ARIA label for the back to top button"
|
||||
},
|
||||
"theme.blog.archive.title": {
|
||||
"message": "Archive",
|
||||
"description": "The page & hero title of the blog archive page"
|
||||
},
|
||||
"theme.blog.archive.description": {
|
||||
"message": "Archive",
|
||||
"description": "The page & hero description of the blog archive page"
|
||||
},
|
||||
"theme.blog.paginator.navAriaLabel": {
|
||||
"message": "Blog list page navigation",
|
||||
"description": "The ARIA label for the blog pagination"
|
||||
},
|
||||
"theme.blog.paginator.newerEntries": {
|
||||
"message": "Newer Entries",
|
||||
"description": "The label used to navigate to the newer blog posts page (previous page)"
|
||||
},
|
||||
"theme.blog.paginator.olderEntries": {
|
||||
"message": "Older Entries",
|
||||
"description": "The label used to navigate to the older blog posts page (next page)"
|
||||
},
|
||||
"theme.blog.post.paginator.navAriaLabel": {
|
||||
"message": "Blog post page navigation",
|
||||
"description": "The ARIA label for the blog posts pagination"
|
||||
},
|
||||
"theme.blog.post.paginator.newerPost": {
|
||||
"message": "Newer Post",
|
||||
"description": "The blog post button label to navigate to the newer/previous post"
|
||||
},
|
||||
"theme.blog.post.paginator.olderPost": {
|
||||
"message": "Older Post",
|
||||
"description": "The blog post button label to navigate to the older/next post"
|
||||
},
|
||||
"theme.blog.post.plurals": {
|
||||
"message": "One post|{count} posts",
|
||||
"description": "Pluralized label for \"{count} posts\". Use as much plural forms (separated by \"|\") as your language support (see https://www.unicode.org/cldr/cldr-aux/charts/34/supplemental/language_plural_rules.html)"
|
||||
},
|
||||
"theme.blog.tagTitle": {
|
||||
"message": "{nPosts} tagged with \"{tagName}\"",
|
||||
"description": "The title of the page for a blog tag"
|
||||
},
|
||||
"theme.tags.tagsPageLink": {
|
||||
"message": "View All Tags",
|
||||
"description": "The label of the link targeting the tag list page"
|
||||
},
|
||||
"theme.colorToggle.ariaLabel": {
|
||||
"message": "Switch between dark and light mode (currently {mode})",
|
||||
"description": "The ARIA label for the navbar color mode toggle"
|
||||
},
|
||||
"theme.colorToggle.ariaLabel.mode.dark": {
|
||||
"message": "dark mode",
|
||||
"description": "The name for the dark color mode"
|
||||
},
|
||||
"theme.colorToggle.ariaLabel.mode.light": {
|
||||
"message": "light mode",
|
||||
"description": "The name for the light color mode"
|
||||
},
|
||||
"theme.docs.breadcrumbs.navAriaLabel": {
|
||||
"message": "Breadcrumbs",
|
||||
"description": "The ARIA label for the breadcrumbs"
|
||||
},
|
||||
"theme.docs.DocCard.categoryDescription": {
|
||||
"message": "{count} items",
|
||||
"description": "The default description for a category card in the generated index about how many items this category includes"
|
||||
},
|
||||
"theme.docs.paginator.navAriaLabel": {
|
||||
"message": "Docs pages",
|
||||
"description": "The ARIA label for the docs pagination"
|
||||
},
|
||||
"theme.docs.paginator.previous": {
|
||||
"message": "Previous",
|
||||
"description": "The label used to navigate to the previous doc"
|
||||
},
|
||||
"theme.docs.paginator.next": {
|
||||
"message": "Next",
|
||||
"description": "The label used to navigate to the next doc"
|
||||
},
|
||||
"theme.docs.tagDocListPageTitle.nDocsTagged": {
|
||||
"message": "One doc tagged|{count} docs tagged",
|
||||
"description": "Pluralized label for \"{count} docs tagged\". Use as much plural forms (separated by \"|\") as your language support (see https://www.unicode.org/cldr/cldr-aux/charts/34/supplemental/language_plural_rules.html)"
|
||||
},
|
||||
"theme.docs.tagDocListPageTitle": {
|
||||
"message": "{nDocsTagged} with \"{tagName}\"",
|
||||
"description": "The title of the page for a docs tag"
|
||||
},
|
||||
"theme.docs.versionBadge.label": {
|
||||
"message": "Version: {versionLabel}"
|
||||
},
|
||||
"theme.docs.versions.unreleasedVersionLabel": {
|
||||
"message": "This is unreleased documentation for {siteTitle} {versionLabel} version.",
|
||||
"description": "The label used to tell the user that he's browsing an unreleased doc version"
|
||||
},
|
||||
"theme.docs.versions.unmaintainedVersionLabel": {
|
||||
"message": "This is documentation for {siteTitle} {versionLabel}, which is no longer actively maintained.",
|
||||
"description": "The label used to tell the user that he's browsing an unmaintained doc version"
|
||||
},
|
||||
"theme.docs.versions.latestVersionSuggestionLabel": {
|
||||
"message": "For up-to-date documentation, see the {latestVersionLink} ({versionLabel}).",
|
||||
"description": "The label used to tell the user to check the latest version"
|
||||
},
|
||||
"theme.docs.versions.latestVersionLinkLabel": {
|
||||
"message": "latest version",
|
||||
"description": "The label used for the latest version suggestion link label"
|
||||
},
|
||||
"theme.common.editThisPage": {
|
||||
"message": "Edit this page",
|
||||
"description": "The link label to edit the current page"
|
||||
},
|
||||
"theme.lastUpdated.atDate": {
|
||||
"message": " on {date}",
|
||||
"description": "The words used to describe on which date a page has been last updated"
|
||||
},
|
||||
"theme.lastUpdated.byUser": {
|
||||
"message": " by {user}",
|
||||
"description": "The words used to describe by who the page has been last updated"
|
||||
},
|
||||
"theme.lastUpdated.lastUpdatedAtBy": {
|
||||
"message": "Last updated{atDate}{byUser}",
|
||||
"description": "The sentence used to display when a page has been last updated, and by who"
|
||||
},
|
||||
"theme.common.headingLinkTitle": {
|
||||
"message": "Direct link to {heading}",
|
||||
"description": "Title for link to heading"
|
||||
},
|
||||
"theme.navbar.mobileVersionsDropdown.label": {
|
||||
"message": "Versions",
|
||||
"description": "The label for the navbar versions dropdown on mobile view"
|
||||
},
|
||||
"theme.tags.tagsListLabel": {
|
||||
"message": "Tags:",
|
||||
"description": "The label alongside a tag list"
|
||||
},
|
||||
"theme.AnnouncementBar.closeButtonAriaLabel": {
|
||||
"message": "Close",
|
||||
"description": "The ARIA label for close button of announcement bar"
|
||||
},
|
||||
"theme.blog.sidebar.navAriaLabel": {
|
||||
"message": "Blog recent posts navigation",
|
||||
"description": "The ARIA label for recent posts in the blog sidebar"
|
||||
},
|
||||
"theme.CodeBlock.copied": {
|
||||
"message": "Copied",
|
||||
"description": "The copied button label on code blocks"
|
||||
},
|
||||
"theme.CodeBlock.copyButtonAriaLabel": {
|
||||
"message": "Copy code to clipboard",
|
||||
"description": "The ARIA label for copy code blocks button"
|
||||
},
|
||||
"theme.CodeBlock.copy": {
|
||||
"message": "Copy",
|
||||
"description": "The copy button label on code blocks"
|
||||
},
|
||||
"theme.CodeBlock.wordWrapToggle": {
|
||||
"message": "Toggle word wrap",
|
||||
"description": "The title attribute for toggle word wrapping button of code block lines"
|
||||
},
|
||||
"theme.DocSidebarItem.toggleCollapsedCategoryAriaLabel": {
|
||||
"message": "Toggle the collapsible sidebar category '{label}'",
|
||||
"description": "The ARIA label to toggle the collapsible sidebar category"
|
||||
},
|
||||
"theme.NavBar.navAriaLabel": {
|
||||
"message": "Main",
|
||||
"description": "The ARIA label for the main navigation"
|
||||
},
|
||||
"theme.navbar.mobileLanguageDropdown.label": {
|
||||
"message": "Languages",
|
||||
"description": "The label for the mobile language switcher dropdown"
|
||||
},
|
||||
"theme.TOCCollapsible.toggleButtonLabel": {
|
||||
"message": "On this page",
|
||||
"description": "The label used by the button on the collapsible TOC component"
|
||||
},
|
||||
"theme.blog.post.readMore": {
|
||||
"message": "Read More",
|
||||
"description": "The label used in blog post item excerpts to link to full blog posts"
|
||||
},
|
||||
"theme.blog.post.readMoreLabel": {
|
||||
"message": "Read more about {title}",
|
||||
"description": "The ARIA label for the link to full blog posts from excerpts"
|
||||
},
|
||||
"theme.blog.post.readingTime.plurals": {
|
||||
"message": "One min read|{readingTime} min read",
|
||||
"description": "Pluralized label for \"{readingTime} min read\". Use as much plural forms (separated by \"|\") as your language support (see https://www.unicode.org/cldr/cldr-aux/charts/34/supplemental/language_plural_rules.html)"
|
||||
},
|
||||
"theme.docs.breadcrumbs.home": {
|
||||
"message": "Home page",
|
||||
"description": "The ARIA label for the home page in the breadcrumbs"
|
||||
},
|
||||
"theme.docs.sidebar.collapseButtonTitle": {
|
||||
"message": "Collapse sidebar",
|
||||
"description": "The title attribute for collapse button of doc sidebar"
|
||||
},
|
||||
"theme.docs.sidebar.collapseButtonAriaLabel": {
|
||||
"message": "Collapse sidebar",
|
||||
"description": "The title attribute for collapse button of doc sidebar"
|
||||
},
|
||||
"theme.docs.sidebar.navAriaLabel": {
|
||||
"message": "Docs sidebar",
|
||||
"description": "The ARIA label for the sidebar navigation"
|
||||
},
|
||||
"theme.docs.sidebar.closeSidebarButtonAriaLabel": {
|
||||
"message": "Close navigation bar",
|
||||
"description": "The ARIA label for close button of mobile sidebar"
|
||||
},
|
||||
"theme.docs.sidebar.expandButtonTitle": {
|
||||
"message": "Expand sidebar",
|
||||
"description": "The ARIA label and title attribute for expand button of doc sidebar"
|
||||
},
|
||||
"theme.docs.sidebar.expandButtonAriaLabel": {
|
||||
"message": "Expand sidebar",
|
||||
"description": "The ARIA label and title attribute for expand button of doc sidebar"
|
||||
},
|
||||
"theme.navbar.mobileSidebarSecondaryMenu.backButtonLabel": {
|
||||
"message": "← Back to main menu",
|
||||
"description": "The label of the back button to return to main menu, inside the mobile navbar sidebar secondary menu (notably used to display the docs sidebar)"
|
||||
},
|
||||
"theme.docs.sidebar.toggleSidebarButtonAriaLabel": {
|
||||
"message": "Toggle navigation bar",
|
||||
"description": "The ARIA label for hamburger menu button of mobile navigation"
|
||||
},
|
||||
"theme.SearchPage.existingResultsTitle": {
|
||||
"message": "Search results for \"{query}\"",
|
||||
"description": "The search page title for non-empty query"
|
||||
},
|
||||
"theme.SearchPage.emptyResultsTitle": {
|
||||
"message": "Search the documentation",
|
||||
"description": "The search page title for empty query"
|
||||
},
|
||||
"theme.SearchPage.searchContext.everywhere": {
|
||||
"message": "everywhere"
|
||||
},
|
||||
"theme.SearchPage.documentsFound.plurals": {
|
||||
"message": "1 document found|{count} documents found",
|
||||
"description": "Pluralized label for \"{count} documents found\". Use as much plural forms (separated by \"|\") as your language support (see https://www.unicode.org/cldr/cldr-aux/charts/34/supplemental/language_plural_rules.html)"
|
||||
},
|
||||
"theme.SearchPage.noResultsText": {
|
||||
"message": "No documents were found",
|
||||
"description": "The paragraph for empty search result"
|
||||
},
|
||||
"theme.SearchBar.noResultsText": {
|
||||
"message": "No results"
|
||||
},
|
||||
"theme.SearchBar.seeAll": {
|
||||
"message": "See all results"
|
||||
},
|
||||
"theme.SearchBar.seeAllOutsideContext": {
|
||||
"message": "See results outside {context}"
|
||||
},
|
||||
"theme.SearchBar.searchInContext": {
|
||||
"message": "See all results in {context}"
|
||||
},
|
||||
"theme.SearchBar.label": {
|
||||
"message": "Search",
|
||||
"description": "The ARIA label and placeholder for search button"
|
||||
},
|
||||
"theme.ErrorPageContent.tryAgain": {
|
||||
"message": "Try again",
|
||||
"description": "The label of the button to try again rendering when the React error boundary captures an error"
|
||||
},
|
||||
"theme.common.skipToMainContent": {
|
||||
"message": "Skip to main content",
|
||||
"description": "The skip to content label used for accessibility, allowing to rapidly navigate to main content with keyboard tab/enter navigation"
|
||||
},
|
||||
"theme.tags.tagsPageTitle": {
|
||||
"message": "Tags",
|
||||
"description": "The title of the tag list page"
|
||||
}
|
||||
}
|
||||
|
|
@ -0,0 +1,14 @@
|
|||
{
|
||||
"title": {
|
||||
"message": "Blog",
|
||||
"description": "The title for the blog used in SEO"
|
||||
},
|
||||
"description": {
|
||||
"message": "Blog",
|
||||
"description": "The description for the blog used in SEO"
|
||||
},
|
||||
"sidebar.title": {
|
||||
"message": "Recent posts",
|
||||
"description": "The label for the left sidebar"
|
||||
}
|
||||
}
|
||||
|
|
@ -0,0 +1,58 @@
|
|||
{
|
||||
"version.label": {
|
||||
"message": "Next",
|
||||
"description": "The label for version current"
|
||||
},
|
||||
"sidebar.defaultSidebar.category.快速开始": {
|
||||
"message": "Quick Start",
|
||||
"description": "The label for category Quick Start in sidebar defaultSidebar"
|
||||
},
|
||||
"sidebar.defaultSidebar.category.代码库管理": {
|
||||
"message": "Repository Management",
|
||||
"description": "The label for category Repository Management in sidebar defaultSidebar"
|
||||
},
|
||||
"sidebar.defaultSidebar.category.组织管理": {
|
||||
"message": "Organization Management",
|
||||
"description": "The label for category Organization Management in sidebar defaultSidebar"
|
||||
},
|
||||
"sidebar.defaultSidebar.category.疑修(Issue)": {
|
||||
"message": "Issues",
|
||||
"description": "The label for category Issues in sidebar defaultSidebar"
|
||||
},
|
||||
"sidebar.defaultSidebar.category.合并请求(PR)": {
|
||||
"message": "Pull Requests",
|
||||
"description": "The label for category Pull Requests in sidebar defaultSidebar"
|
||||
},
|
||||
"sidebar.defaultSidebar.category.DevOps引擎(Engine)": {
|
||||
"message": "DevOps Engine",
|
||||
"description": "The label for category DevOps Engine in sidebar defaultSidebar"
|
||||
},
|
||||
"sidebar.defaultSidebar.category.维基(Wiki)": {
|
||||
"message": "Wiki",
|
||||
"description": "The label for category Wiki in sidebar defaultSidebar"
|
||||
},
|
||||
"sidebar.defaultSidebar.category.机器人(Bot)": {
|
||||
"message": "Bot Market",
|
||||
"description": "The label for category Bot Market in sidebar defaultSidebar"
|
||||
},
|
||||
"sidebar.defaultSidebar.category.第三方服务": {
|
||||
"message": "Third-party Services",
|
||||
"description": "The label for category Third-party Services in sidebar defaultSidebar"
|
||||
},
|
||||
"sidebar.defaultSidebar.category.通知": {
|
||||
"message": "Notifications",
|
||||
"description": "The label for category Notifications in sidebar defaultSidebar"
|
||||
},
|
||||
"sidebar.defaultSidebar.category.个人主页建站": {
|
||||
"message": "Personal Homepage",
|
||||
"description": "The label for category Personal Homepage in sidebar defaultSidebar"
|
||||
},
|
||||
"sidebar.defaultSidebar.category.服务协议": {
|
||||
"message": "Service Agreement",
|
||||
"description": "The label for category Service Agreement in sidebar defaultSidebar"
|
||||
},
|
||||
"sidebar.DocsSidebar.doc.Docs": {
|
||||
"message": "Docs",
|
||||
"description": "The label for the doc item Docs in sidebar DocsSidebar, linking to the doc intro"
|
||||
}
|
||||
}
|
||||
|
|
@ -0,0 +1,7 @@
|
|||
{
|
||||
"label": "Documentation",
|
||||
"position": 1,
|
||||
"link": {
|
||||
"type": "generated-index"
|
||||
}
|
||||
}
|
||||
|
|
@ -0,0 +1,7 @@
|
|||
{
|
||||
"label": "Bot Market",
|
||||
"position": 8,
|
||||
"link": {
|
||||
"type": "generated-index"
|
||||
}
|
||||
}
|
||||
|
|
@ -0,0 +1,68 @@
|
|||
---
|
||||
sidebar_label: 'Bot Configuration'
|
||||
sidebar_position: 2
|
||||
---
|
||||
import MyButton from './mybutton';
|
||||
|
||||
<MyButton onClick={() => {
|
||||
var pElements = document.getElementsByTagName('p');
|
||||
var hElements = document.getElementsByTagName('h1');
|
||||
var hzh = ['bot配置','bot配置'];
|
||||
var hen = ['Bot Configuration','Bot Configuration'];
|
||||
var zhtranalate = ['Bot配置是开发者进行bot维护和配置的重要模块,主要包括bot基本信息维护、权限&订阅事件管理、高级选项配置等功能。','Bot的基本信息维护中,开发者可以看到bot的各项基本信息,并可以根据需要对bot的头像,名称,Webhook地址等进行修改。','','Bot的权限&订阅事件管理中,开发者可根据对仓库资源的访问需要为bot分配不同的权限和等级,比如增加代码库权限,将拉取请求的写权限变为读权限等。开发者还能更改当前bot订阅的事件列表,比如订阅代码库推送,取消拉取请求分配订阅等,以实现bot功能的更新与升级。','','Bot高级选项配置中,开发者可以改变bot的公私有状态,从而影响到bot的使用范围。需要注意的是,公开状态下的bot在已有其他仓库安装的情况下不能变成私有。开发者可选择将bot上架到市场,需要填写上架信息,包括市场简介,主要功能,次要功能等各项信息。','开发者还能进行bot的删除和转让操作,发起转让意味着更改bot的所有权,需要输入接受者的用户名。在接受者确定接受后,即可完成bot的所有权变更,拒绝则会取消本次的转让操作。','','©Copyright 2024 CCF 开源发展委员会','Powered by Trustie& IntelliDE 京ICP备13000930号'];
|
||||
var entranslate = ['Bot configuration is an important module for developers to maintain and configure bots, mainly including basic bot information maintenance, permission & subscription event management, advanced option configuration, and other functions.','In the basic information maintenance section, developers can view and modify various basic information of the bot, such as its avatar, name, Webhook URL, etc.','','In the permissions & subscription events management section, developers can assign different permissions and levels to bots based on their access needs to repository resources, such as adding repository permissions or changing pull request write permissions to read permissions. Developers can also modify the bot\'s event subscription list, such as subscribing to repository push events or unsubscribing from pull request assignment events, to update and upgrade bot functionality.','','In the advanced options configuration section, developers can change the bot\'s public/private status, which affects its scope of use. Note that a public bot cannot be made private if it is already installed in other repositories. Developers can choose to publish their bot to the marketplace by providing listing information, including market description, primary features, secondary features, and other details.','Developers can also perform bot deletion and transfer operations. Initiating a transfer means changing the bot\'s ownership and requires entering the recipient\'s username. The ownership change is completed once the recipient accepts; if rejected, the transfer operation is cancelled.','','©Copyright 2024 CCF Open Source Development Committee','Powered by Trustie& IntelliDE 京ICP备13000930号'];
|
||||
if (pElements[0].innerText == zhtranalate[0]){
|
||||
for (var i = 0; i < pElements.length; i++) {
|
||||
if (pElements[i].innerText != ''){
|
||||
if (i < pElements.length){
|
||||
pElements[i].innerText = entranslate[i];
|
||||
}
|
||||
}
|
||||
}
|
||||
}
|
||||
else{
|
||||
for (var i = 0; i < pElements.length; i++) {
|
||||
if (pElements[i].innerText != ''){
|
||||
if (i < pElements.length){
|
||||
pElements[i].innerText = zhtranalate[i];
|
||||
}
|
||||
}
|
||||
}
|
||||
}
|
||||
if (hElements[0].innerText == hzh[0]){
|
||||
for (var i = 0; i < hElements.length; i++) {
|
||||
if (hElements[i].innerText != ''){
|
||||
if (i < hElements.length){
|
||||
hElements[i].innerText = hen[i];
|
||||
}
|
||||
}
|
||||
}
|
||||
}
|
||||
else{
|
||||
for (var i = 0; i < hElements.length; i++) {
|
||||
if (hElements[i].innerText != ''){
|
||||
if (i < hElements.length){
|
||||
hElements[i].innerText = hzh[i];
|
||||
}
|
||||
}
|
||||
}
|
||||
}
|
||||
}}>中/En</MyButton>
|
||||
|
||||
# Bot Configuration
|
||||
|
||||
Bot configuration is an important module for developers to maintain and configure bots, mainly including basic bot information maintenance, permission & subscription event management, advanced option configuration, and other functions.
|
||||
|
||||
In the basic information maintenance section, developers can view and modify various basic information of the bot, such as its avatar, name, Webhook URL, etc.
|
||||
|
||||

|
||||
|
||||
In the permissions & subscription events management section, developers can assign different permissions and levels to bots based on their access needs to repository resources, such as adding repository permissions or changing pull request write permissions to read permissions. Developers can also modify the bot's event subscription list, such as subscribing to repository push events or unsubscribing from pull request assignment events, to update and upgrade bot functionality.
|
||||
|
||||

|
||||
|
||||
In the advanced options configuration section, developers can change the bot's public/private status, which affects its scope of use. Note that a public bot cannot be made private if it is already installed in other repositories. Developers can choose to publish their bot to the marketplace by providing listing information, including market description, primary features, secondary features, and other details.
|
||||
|
||||
Developers can also perform bot deletion and transfer operations. Initiating a transfer means changing the bot's ownership and requires entering the recipient's username. The ownership change is completed once the recipient accepts; if rejected, the transfer operation is cancelled.
|
||||
|
||||

|
||||
|
|
@ -0,0 +1 @@
|
|||
|
||||
|
|
@ -0,0 +1,87 @@
|
|||
---
|
||||
sidebar_label: 'Bot Installation'
|
||||
sidebar_position: 1
|
||||
---
|
||||
import MyButton from './mybutton';
|
||||
|
||||
<MyButton onClick={() => {
|
||||
var pElements = document.getElementsByTagName('p');
|
||||
var hElements = document.getElementsByTagName('h1');
|
||||
var aElements = document.getElementsByTagName('a');
|
||||
var hzh = ['bot安装','bot安装'];
|
||||
var hen = ['Bot Installation','Bot Installation'];
|
||||
var azh = ['跳到主要内容','','帮助中心','','','','','','','','','','','','','','','','','','','','','机器人(Bot)','编辑此页','上一页 bot市场','下一页bot 配置','网站首页','关于我们','教学实践','合作伙伴','API文档','Git常用命令','引擎使用手册','服务协议','官网邮箱:gitlink@ccf.org.cn','QQ群','公众号'];
|
||||
var aen = ['Jump to main content','','Help Center','','','','','','','','','','','','','','','','','','','','','Robot (Bot)','Edit this page','Previous: Bot Market','Next: Bot Configuration','Website Homepage','About Us','Teaching Practice','Partners','API Documentation','Common Git Commands','Engine User Manual','Service Agreement','Official Email: gitlink@ccf.org.cn','QQ Group','Official Account'];
|
||||
var zhtranalate = ['Bot安装是进行bot安装和管理控制的重要模块,主要包括bot安装、安装查询、安装管理等功能。','在bot详情页,用户点击"安装此Bot"按钮后,可以看到该bot工作所需的各项权限信息。若用户同意授予bot所需的相关权限即可进行安装。用户可选择将bot安装到所有仓库(用户拥有的所有仓库)中,也可以选择指定的仓库进行安装。','','在个人"设置"或者"仓库设置"中,用户可以看到目前已经安装的Bot情况,点击"配置"按钮可以对bot安装情况进行配置,点击"卸载"按钮可以进行卸载。','','在bot安装配置页中,用户可以掌握该bot的安装位置和工作状态。若用户需要更改bot的工作仓库时,可以进行更改安装位置。bot的工作状态包括激活和挂起,用户可根据需要对bot的状态进行调整,将其挂起或者激活,会影响到bot对仓库数据的访问权限。','','©Copyright 2024 CCF 开源发展委员会','Powered by Trustie& IntelliDE 京ICP备13000930号'];
|
||||
var entranslate = ['Bot installation is an important module for bot installation and management control, which mainly includes functions such as bot installation, installation queries, and installation management.','On the bot details page, after clicking the "Install this Bot" button, users can see the necessary permission information for the bot to work. If the user agrees to grant the necessary permissions to the bot, installation can proceed. Users can choose to install the bot in all repositories (all repositories owned by the user) or select specific repositories for installation.','','In personal "Settings" or "Repository Settings", users can see the current installation status of bots. Click the "Configure" button to configure the bot installation status, and click the "Uninstall" button to uninstall.','','In the bot installation configuration page, users can manage the installation location and working status of the bot. If users need to change the bot\'s working repository, they can change the installation location. The working status of bots includes Active and Suspended. Users can adjust the status of bots as needed - suspending or activating them will affect their access permissions to repository data.','','©Copyright 2024 CCF Open Source Development Committee','Powered by Trustie& IntelliDE 京ICP备13000930号'];
|
||||
if (pElements[0].innerText == zhtranalate[0]){
|
||||
for (var i = 0; i < pElements.length; i++) {
|
||||
if (pElements[i].innerText != ''){
|
||||
if (i < pElements.length){
|
||||
pElements[i].innerText = entranslate[i];
|
||||
}
|
||||
}
|
||||
}
|
||||
}
|
||||
else{
|
||||
for (var i = 0; i < pElements.length; i++) {
|
||||
if (pElements[i].innerText != ''){
|
||||
if (i < pElements.length){
|
||||
pElements[i].innerText = zhtranalate[i];
|
||||
}
|
||||
}
|
||||
}
|
||||
}
|
||||
if (hElements[0].innerText == hzh[0]){
|
||||
for (var i = 0; i < hElements.length; i++) {
|
||||
if (hElements[i].innerText != ''){
|
||||
if (i < hElements.length){
|
||||
hElements[i].innerText = hen[i];
|
||||
}
|
||||
}
|
||||
}
|
||||
}
|
||||
else{
|
||||
for (var i = 0; i < hElements.length; i++) {
|
||||
if (hElements[i].innerText != ''){
|
||||
if (i < hElements.length){
|
||||
hElements[i].innerText = hzh[i];
|
||||
}
|
||||
}
|
||||
}
|
||||
}
|
||||
if (aElements[0].innerText == azh[0]){
|
||||
for (var i = 0; i < aElements.length; i++) {
|
||||
if (aElements[i].innerText != ''){
|
||||
if (i < aElements.length){
|
||||
aElements[i].innerText = aen[i];
|
||||
}
|
||||
}
|
||||
}
|
||||
}
|
||||
else{
|
||||
for (var i = 0; i < aElements.length; i++) {
|
||||
if (aElements[i].innerText != ''){
|
||||
if (i < aElements.length){
|
||||
aElements[i].innerText = azh[i];
|
||||
}
|
||||
}
|
||||
}
|
||||
}
|
||||
}}>中/En</MyButton>
|
||||
|
||||
# Bot Installation
|
||||
|
||||
Bot installation is an important module for bot installation and management control, which mainly includes functions such as bot installation, installation queries, and installation management.
|
||||
|
||||
On the bot details page, after clicking the "Install this Bot" button, users can see the necessary permission information for the bot to work. If the user agrees to grant the necessary permissions to the bot, installation can proceed. Users can choose to install the bot in all repositories (all repositories owned by the user) or select specific repositories for installation.
|
||||
|
||||

|
||||
|
||||
In personal "Settings" or "Repository Settings", users can see the current installation status of bots. Click the "Configure" button to configure the bot installation status, and click the "Uninstall" button to uninstall.
|
||||
|
||||

|
||||
|
||||
In the bot installation configuration page, users can manage the installation location and working status of the bot. If users need to change the bot's working repository, they can change the installation location. The working status of bots includes Active and Suspended. Users can adjust the status of bots as needed - suspending or activating them will affect their access permissions to repository data.
|
||||
|
||||

|
||||
|
|
@ -0,0 +1,76 @@
|
|||
---
|
||||
sidebar_label: 'Bot Market'
|
||||
sidebar_position: 4
|
||||
---
|
||||
import MyButton from './mybutton';
|
||||
|
||||
<MyButton onClick={() => {
|
||||
var pElements = document.getElementsByTagName('p');
|
||||
var hElements = document.getElementsByTagName('h1');
|
||||
var hzh = ['Bot市场','Bot市场'];
|
||||
var hen = ['Bot Market','Bot Market'];
|
||||
var zhtranalate = ['Bot市场是进行Bot分享与复用的重要模块,主要包括bot的搜索发现,详情查看等功能。','Bot市场主页中展示了目前所有已经上架市场的bot简要信息,包括bot的头像,名称,开发者,简介和安装次数等信息,用户可根据这些基本信息初步判断该bot是否符合自己的项目需求。','在bot市场主页中,用户可以选择指定的bot种类,筛选出特定分类的bot,在这个种类范围内进行搜索与选择。','此外,用户通过在搜索栏中输入关键字进行搜索,可检索出内容包含指定关键字的相关bot。','用户可结合种类筛选和关键字搜索缩小范围,在市场中快速找到符合项目相关需求的bot。','','在bot市场页中,用户点击指定的bot卡片即可进入该bot的详情页。Bot的详情页包含bot的头像,名称,开发者,种类和详细介绍等信息,用户可在此掌握该bot的各项介绍,进一步判断是否将其安装到指定仓库中。','','在bot详情页中,若用户认为该bot满足自己的项目需求,可点击"安装此Bot"按钮,了解该bot的权限信息,将其安装到指定的仓库中,关于安装的更多介绍可见"Bot安装"部分。','去市场看看吧!','©Copyright 2024 CCF 开源发展委员会','Powered by Trustie& IntelliDE 京ICP备13000930号'];
|
||||
var entranslate = ['The Bot Market is an important module for sharing and reusing bots, mainly including functions such as searching, discovering, and viewing details of bots.' , 'The Bot Market homepage displays brief information about all bots that have been put on the market, including their avatars, names, developers, introductions, and installation counts. Users can use this basic information to preliminarily determine whether the bot meets their project requirements.' , 'On the Bot Market homepage, users can select a specific type of bot, filter out specific categories of bots, and search and select within this category range.' , 'In addition, users can search for relevant bots containing specified keywords by entering keywords in the search bar.' , 'Users can combine category filtering and keyword search to narrow down the scope and quickly find bots that meet project related needs in the market.' , '' , 'In the Bot Market page, users can click on the specified bot card to enter the details page of the bot. The details page of the bot includes information such as the bot avatar, name, developer, type, and detailed introduction. Users can grasp the various introductions of the bot here and further determine whether to install it in the designated repository.' , '' , 'In the bot details page, if users believe that the bot meets their project requirements, they can click the "Install this Bot" button to learn about the bots permission information and install it in the designated repository. For more information on installation, please refer to the "Bot Installation" section.' , 'Go take a look at the market!' , '©Copyright 2024 CCF Open Source Development Committee' , 'Powered by Trustie& IntelliDE 京ICP备13000930号'];
|
||||
if (pElements[0].innerText == zhtranalate[0]){
|
||||
for (var i = 0; i < pElements.length; i++) {
|
||||
if (pElements[i].innerText != ''){
|
||||
if (i < pElements.length){
|
||||
pElements[i].innerText = entranslate[i];
|
||||
}
|
||||
}
|
||||
}
|
||||
}
|
||||
else{
|
||||
for (var i = 0; i < pElements.length; i++) {
|
||||
if (pElements[i].innerText != ''){
|
||||
if (i < pElements.length){
|
||||
pElements[i].innerText = zhtranalate[i];
|
||||
}
|
||||
}
|
||||
}
|
||||
}
|
||||
if (hElements[0].innerText == hzh[0]){
|
||||
for (var i = 0; i < hElements.length; i++) {
|
||||
if (hElements[i].innerText != ''){
|
||||
if (i < hElements.length){
|
||||
hElements[i].innerText = hen[i];
|
||||
}
|
||||
}
|
||||
}
|
||||
}
|
||||
else{
|
||||
for (var i = 0; i < hElements.length; i++) {
|
||||
if (hElements[i].innerText != ''){
|
||||
if (i < hElements.length){
|
||||
hElements[i].innerText = hzh[i];
|
||||
}
|
||||
}
|
||||
}
|
||||
}
|
||||
}}>中/En</MyButton>
|
||||
|
||||
# Bot Market
|
||||
|
||||
The Bot Market is an important module for sharing and reusing bots, mainly including functions such as searching, discovering, and viewing details of bots.
|
||||
|
||||
The Bot Market homepage displays brief information about all bots that have been put on the market, including their avatars, names, developers, introductions, and installation counts. Users can use this basic information to preliminarily determine whether the bot meets their project requirements.
|
||||
|
||||
On the Bot Market homepage, users can select a specific type of bot, filter out specific categories of bots, and search and select within this category range.
|
||||
|
||||
In addition, users can search for relevant bots containing specified keywords by entering keywords in the search bar.
|
||||
|
||||
Users can combine category filtering and keyword search to narrow down the scope and quickly find bots that meet project related needs in the market.
|
||||
|
||||

|
||||
|
||||
In the Bot Market page, users can click on the specified bot card to enter the details page of the bot. The details page of the bot includes information such as the bot avatar, name, developer, type, and detailed introduction. Users can grasp the various introductions of the bot here and further determine whether to install it in the designated repository.
|
||||
|
||||

|
||||
|
||||
In the bot details page, if users believe that the bot meets their project requirements, they can click the "Install this Bot" button to learn about the bot's permission information and install it in the designated repository. For more information on installation, please refer to the "Bot Installation" section.
|
||||
|
||||
Go take a look at the market!
|
||||
|
||||
<MyButton onClick={() => {
|
||||
location.href = "https://www.gitlink.org.cn/softbot";
|
||||
}}>Bot Market</MyButton>
|
||||
|
|
@ -0,0 +1,104 @@
|
|||
---
|
||||
sidebar_label: "Bot Installation"
|
||||
title: "Bot Installation and Configuration"
|
||||
---
|
||||
|
||||
# Bot Installation Guide
|
||||
|
||||
Learn how to install and configure bots from the GitLink Bot Market to enhance your workflow.
|
||||
|
||||
## Bot Market Overview
|
||||
|
||||
1. **What are Bots?**
|
||||
- Automated assistants
|
||||
- Workflow automation
|
||||
- Integration tools
|
||||
- Process optimization
|
||||
|
||||
2. **Bot Categories**
|
||||
- Code review bots
|
||||
- Security scanning bots
|
||||
- Documentation bots
|
||||
- Deployment bots
|
||||
- Notification bots
|
||||
|
||||
## Installation Process
|
||||
|
||||
1. **Prerequisites**
|
||||
- Repository admin access
|
||||
- Required permissions
|
||||
- Compatible repository settings
|
||||
- Bot-specific requirements
|
||||
|
||||
2. **Installation Steps**
|
||||
- Browse Bot Market
|
||||
- Select desired bot
|
||||
- Review permissions
|
||||
- Configure settings
|
||||
- Activate bot
|
||||
|
||||
## Configuration
|
||||
|
||||
1. **Basic Settings**
|
||||
- Bot permissions
|
||||
- Webhook setup
|
||||
- Event triggers
|
||||
- Notification preferences
|
||||
- Custom rules
|
||||
|
||||
2. **Advanced Options**
|
||||
- Custom workflows
|
||||
- Integration settings
|
||||
- Schedule configuration
|
||||
- Performance tuning
|
||||
- Error handling
|
||||
|
||||
## Best Practices
|
||||
|
||||
1. **Security**
|
||||
- Permission review
|
||||
- Access limitations
|
||||
- Token management
|
||||
- Regular audits
|
||||
|
||||
2. **Usage**
|
||||
- Clear documentation
|
||||
- Team training
|
||||
- Regular updates
|
||||
- Performance monitoring
|
||||
|
||||
## Common Use Cases
|
||||
|
||||
1. **Code Quality**
|
||||
- Automated code review
|
||||
- Style checking
|
||||
- Security scanning
|
||||
- Dependency updates
|
||||
|
||||
2. **Workflow Automation**
|
||||
- Issue management
|
||||
- PR workflows
|
||||
- Release automation
|
||||
- Documentation updates
|
||||
|
||||
## Troubleshooting
|
||||
|
||||
1. **Common Issues**
|
||||
- Permission errors
|
||||
- Configuration problems
|
||||
- Integration issues
|
||||
- Performance concerns
|
||||
|
||||
2. **Resolution Steps**
|
||||
- Check logs
|
||||
- Verify settings
|
||||
- Update configurations
|
||||
- Contact support
|
||||
|
||||
## Need Help?
|
||||
|
||||
For assistance with bot installation:
|
||||
|
||||
1. Visit [Bot Market](/bot-market)
|
||||
2. Contact [support team](/feedback)
|
||||
3. Join community discussions
|
||||
|
|
@ -0,0 +1,13 @@
|
|||
import React from 'react';
|
||||
import styles from './mybutton.module.css'; // CSS module file for styles
|
||||
|
||||
const MyButton = ({ onClick, children, className = '' }) => (
|
||||
<button
|
||||
onClick={onClick}
|
||||
className={`${styles.myButton} ${className}`} // Use CSS module styles
|
||||
>
|
||||
{children}
|
||||
</button>
|
||||
);
|
||||
|
||||
export default MyButton;
|
||||
|
|
@ -0,0 +1,21 @@
|
|||
.myButton {
|
||||
background-color: #30a834; /* Green */
|
||||
border: none;
|
||||
color: #fff; /* White or other color that contrasts well with green background */
|
||||
padding: 15px 32px;
|
||||
text-align: center;
|
||||
text-decoration: none;
|
||||
display: inline-block;
|
||||
font-size: 16px;
|
||||
margin: 4px 2px;
|
||||
cursor: pointer;
|
||||
position: absolute;
|
||||
right: 0;
|
||||
/* Additional styles like transitions, shadows etc. */
|
||||
transition: background-color 0.3s ease; /* Background color transition effect */
|
||||
box-shadow: 0 4px 8px rgba(0, 0, 0, 0.1); /* Simple shadow effect */
|
||||
}
|
||||
|
||||
.myButton:hover {
|
||||
background-color: #288f2c; /* Change background color on hover */
|
||||
}
|
||||
|
|
@ -0,0 +1,7 @@
|
|||
{
|
||||
"label": "DevOps Engine",
|
||||
"position": 6,
|
||||
"link": {
|
||||
"type": "generated-index"
|
||||
}
|
||||
}
|
||||
|
|
@ -0,0 +1,13 @@
|
|||
---
|
||||
sidebar_label: 'Code Pipeline'
|
||||
sidebar_position: 5
|
||||
---
|
||||
|
||||
# Code Pipeline
|
||||
You can configure pipelines in code form (YAML format). First, select the code pipeline and corresponding branch:
|
||||
|
||||

|
||||
|
||||
Edit the pipeline code. The concepts of pipeline name description, triggers, global parameters, serial/concurrent execution, and pipeline orchestration are the same as in graphical pipelines, as described below:
|
||||
|
||||

|
||||
|
|
@ -0,0 +1,10 @@
|
|||
---
|
||||
sidebar_label: 'Execution Records'
|
||||
sidebar_position: 6
|
||||
---
|
||||
|
||||
# Execution Records
|
||||
|
||||
Users can view the running status of pipelines
|
||||
|
||||

|
||||
|
|
@ -0,0 +1,48 @@
|
|||
---
|
||||
sidebar_label: 'Graphical Pipeline'
|
||||
sidebar_position: 4
|
||||
---
|
||||
|
||||
# Graphical Pipeline
|
||||
|
||||
## Basic Information
|
||||
You can edit the pipeline's name and description.
|
||||
|
||||
Pipeline names must be unique within the same repository.
|
||||
|
||||

|
||||
|
||||
## Triggers
|
||||
Note: When orchestrating the pipeline, triggers should be placed before the start node; currently, only one trigger is supported per pipeline.
|
||||
|
||||
* Cron Trigger: You can set specific trigger times by filling in cron expressions
|
||||

|
||||
|
||||
* GitLink_Webhook Event Trigger: Provides common code change event triggers, including push code, pull requests, and create tags
|
||||

|
||||
|
||||
## Global Parameters
|
||||
|
||||
Once added, these can be used throughout the current pipeline
|
||||
|
||||

|
||||
|
||||
Usage Example
|
||||
|
||||

|
||||
|
||||
## Concurrent Execution
|
||||
|
||||

|
||||
|
||||
When enabled, the same pipeline can execute n pipeline instances simultaneously (each trigger creates one pipeline instance);
|
||||
|
||||

|
||||
|
||||
If not enabled, while the current pipeline instance is executing, subsequent instances will be in a queued state (maximum 5 instances can be queued). The next instance begins execution after the current instance completes.
|
||||
|
||||

|
||||
|
||||
## Pipeline Orchestration
|
||||
|
||||
Each pipeline must have one start node, one end node, and at least one task node. Both serial and parallel orchestration are supported.
|
||||
|
|
@ -0,0 +1,94 @@
|
|||
---
|
||||
sidebar_label: "DevOps Engine Overview"
|
||||
title: "DevOps Engine Overview"
|
||||
---
|
||||
|
||||
# DevOps Engine
|
||||
|
||||
GitLink's DevOps Engine provides comprehensive CI/CD capabilities for your development workflow.
|
||||
|
||||
## Key Features
|
||||
|
||||
1. **Pipeline Management**
|
||||
- Visual pipeline editor
|
||||
- Custom workflow creation
|
||||
- Pipeline templates
|
||||
- Execution history
|
||||
- Real-time monitoring
|
||||
|
||||
2. **Build Automation**
|
||||
- Multiple language support
|
||||
- Dependency management
|
||||
- Build caching
|
||||
- Artifact storage
|
||||
- Build matrix
|
||||
|
||||
3. **Testing Integration**
|
||||
- Unit testing
|
||||
- Integration testing
|
||||
- Code coverage
|
||||
- Test reports
|
||||
- Quality gates
|
||||
|
||||
## Configuration
|
||||
|
||||
1. **Pipeline Setup**
|
||||
- YAML configuration
|
||||
- Environment variables
|
||||
- Secrets management
|
||||
- Resource allocation
|
||||
- Triggers and events
|
||||
|
||||
2. **Environment Management**
|
||||
- Development
|
||||
- Staging
|
||||
- Production
|
||||
- Custom environments
|
||||
|
||||
## Best Practices
|
||||
|
||||
1. **Pipeline Design**
|
||||
- Modular stages
|
||||
- Parallel execution
|
||||
- Conditional steps
|
||||
- Reusable components
|
||||
- Error handling
|
||||
|
||||
2. **Security**
|
||||
- Secure credentials
|
||||
- Access control
|
||||
- Audit logging
|
||||
- Compliance checks
|
||||
- Vulnerability scanning
|
||||
|
||||
## Common Use Cases
|
||||
|
||||
1. **Continuous Integration**
|
||||
- Automated builds
|
||||
- Code quality checks
|
||||
- Unit testing
|
||||
- Integration testing
|
||||
- Security scanning
|
||||
|
||||
2. **Continuous Deployment**
|
||||
- Automated deployment
|
||||
- Environment promotion
|
||||
- Rollback capability
|
||||
- Release management
|
||||
- Monitoring integration
|
||||
|
||||
## Getting Started
|
||||
|
||||
1. Configure pipeline
|
||||
2. Set up environments
|
||||
3. Define workflows
|
||||
4. Add security measures
|
||||
5. Monitor execution
|
||||
|
||||
## Need Help?
|
||||
|
||||
For assistance with DevOps Engine:
|
||||
|
||||
1. Check our [documentation](/devops-engine)
|
||||
2. Contact [support](/feedback)
|
||||
3. Join community discussions
|
||||
|
|
@ -0,0 +1,13 @@
|
|||
---
|
||||
sidebar_label: 'Introduction to Engine'
|
||||
sidebar_position: 1
|
||||
---
|
||||
|
||||
# Engine
|
||||
|
||||
Engine is a DevOps tool provided by GitLink that builds development, testing, and deployment pipelines through simple node orchestration, creating automated software delivery processes.
|
||||
It enables continuous code integration, allowing developers to discover quality issues early, quickly locate and fix them, improving software development efficiency and quality. Automated code scanning, compilation and packaging, and unit testing free development teams from repetitive work, allowing them to focus on more valuable tasks.
|
||||
|
||||

|
||||
|
||||
In the Engine interface, users can create and edit graphical pipelines or code pipelines, configure external parameters, manage keys, and perform other operations.
|
||||
|
|
@ -0,0 +1,16 @@
|
|||
---
|
||||
sidebar_label: 'Key Settings'
|
||||
sidebar_position: 3
|
||||
---
|
||||
|
||||
# Key Settings
|
||||
|
||||
Store usernames and passwords, keys, certificates, etc. in key management. Once configured, they can be used directly in pipelines, avoiding the risk of exposure from direct input.
|
||||
|
||||

|
||||
|
||||
Usage Example
|
||||
|
||||
Note: In node input parameters, the dropdown options are key types. Keys need to be configured in advance before they can be selected for use in pipelines.
|
||||
|
||||

|
||||
|
|
@ -0,0 +1,14 @@
|
|||
---
|
||||
sidebar_label: 'Parameter Configuration'
|
||||
sidebar_position: 2
|
||||
---
|
||||
|
||||
# Parameter Configuration
|
||||
|
||||
Can be used in pipelines to implement dynamic parameter configuration; available in three types: string, number, and boolean.
|
||||
|
||||

|
||||
|
||||
Parameters can be accessed in pipeline configuration as follows:
|
||||
|
||||

|
||||
|
|
@ -0,0 +1,93 @@
|
|||
---
|
||||
sidebar_label: "Introduction"
|
||||
label: "Introduction"
|
||||
sidebar_position: 1
|
||||
slug: /
|
||||
---
|
||||
|
||||
# About GitLink
|
||||
GitLink is the official open-source innovation service platform designated by CCF (China Computer Federation). With the mission of "Serving Open Source Innovation" and the vision of "Becoming a Hub for Open Source Innovation", GitLink upholds the values of "Innovation, Openness, Collaboration, and Sharing". We are dedicated to empowering large-scale open-source collaborative innovation and building an open-source innovation ecosystem for incubating innovative achievements and cultivating new engineering talents!
|
||||
|
||||

|
||||
|
||||
# Platform Features
|
||||
|
||||
- **Distributed Collaborative Development**: Supports online file editing, branch management, contribution statistics, repository forking, and pull requests;
|
||||
- **One-Stop Process Management**: Supports issues, milestones, notifications, label archiving, Wiki documentation, and organization management;
|
||||
- **Efficient Pipeline Operations**: Provides lightweight workflow engine with support for custom configuration, static scanning, and artifact building;
|
||||
- **Multi-Level Code Analysis**: Supports code provenance analysis, license risk analysis, vulnerability detection, and hardening recommendations;
|
||||
- **Multi-Dimensional User Profiling**: Supports development activity statistics, contribution calendar, capability modeling, and role & expertise positioning analysis.
|
||||
|
||||
# Help Documentation
|
||||
The help documentation will assist you in fully understanding the GitLink platform. Let's contribute to open-source innovation together!
|
||||
|
||||
<div class="row">
|
||||
<div class="col col--12">
|
||||
<section class="row list">
|
||||
<article class="col col--6 margin-bottom--lg">
|
||||
<a class="card padding--lg cardContainer" href="/quick-start/register-gitlink-account">
|
||||
<h2 class="text--truncate cardTitle" title="Quick Start">Quick Start</h2>
|
||||
<p>Help users quickly register and use the platform [5 documents]</p>
|
||||
</a></article>
|
||||
<article class="col col--6 margin-bottom--lg">
|
||||
<a class="card padding--lg cardContainer" href="/repository-management/create-repository">
|
||||
<h2 class="text--truncate cardTitle" title="Repository Management">Repository Management</h2>
|
||||
<p>Repository usage and settings [8 documents]</p>
|
||||
</a></article>
|
||||
<article class="col col--6 margin-bottom--lg">
|
||||
<a class="card padding--lg cardContainer" href="/organization-management/organization-introduction">
|
||||
<h2 class="text--truncate cardTitle" title="Organization Management">Organization Management</h2>
|
||||
<p>Organization usage and settings [5 documents]</p>
|
||||
</a></article>
|
||||
<article class="col col--6 margin-bottom--lg">
|
||||
<a class="card padding--lg cardContainer" href="/issues/issues-introduction">
|
||||
<h2 class="text--truncate cardTitle" title="Issues">Issues</h2>
|
||||
<p>Issue usage and settings [7 documents]</p>
|
||||
</a></article>
|
||||
<article class="col col--6 margin-bottom--lg">
|
||||
<a class="card padding--lg cardContainer" href="/pull-requests/pull-requests-introduction">
|
||||
<h2 class="text--truncate cardTitle" title="Pull Requests">Pull Requests</h2>
|
||||
<p>Pull Request usage and settings [5 documents]</p>
|
||||
</a></article>
|
||||
<article class="col col--6 margin-bottom--lg">
|
||||
<a class="card padding--lg cardContainer" href="/devops-engine/engine-introduction">
|
||||
<h2 class="text--truncate cardTitle" title="DevOps Engine">DevOps Engine</h2>
|
||||
<p>DevOps Engine usage and settings [6 documents]</p>
|
||||
</a></article>
|
||||
<article class="col col--6 margin-bottom--lg">
|
||||
<a class="card padding--lg cardContainer" href="/wiki/template-import-export">
|
||||
<h2 class="text--truncate cardTitle" title="Wiki">Wiki</h2>
|
||||
<p>Wiki usage and settings [2 documents]</p>
|
||||
</a></article>
|
||||
<article class="col col--6 margin-bottom--lg">
|
||||
<a class="card padding--lg cardContainer" href="/bot-market/bot-installation">
|
||||
<h2 class="text--truncate cardTitle" title="Bot Market">Bot Market</h2>
|
||||
<p>Bot Market usage and settings [4 documents]</p>
|
||||
</a></article>
|
||||
<article class="col col--6 margin-bottom--lg">
|
||||
<a class="card padding--lg cardContainer" href="/third-party-services/cross-platform-code-sync">
|
||||
<h2 class="text--truncate cardTitle" title="Third-party Services">Third-party Services</h2>
|
||||
<p>Third-party services usage and settings [3 documents]</p>
|
||||
</a></article>
|
||||
<article class="col col--6 margin-bottom--lg">
|
||||
<a class="card padding--lg cardContainer" href="/notifications/notifications-introduction">
|
||||
<h2 class="text--truncate cardTitle" title="Notifications">Notifications</h2>
|
||||
<p>Notifications introduction and settings [2 documents]</p>
|
||||
</a></article>
|
||||
<article class="col col--6 margin-bottom--lg">
|
||||
<a class="card padding--lg cardContainer" href="/personal-homepage/website-creation">
|
||||
<h2 class="text--truncate cardTitle" title="Personal Homepage">Personal Homepage</h2>
|
||||
<p>Personal homepage creation and settings [2 documents]</p>
|
||||
</a></article>
|
||||
<article class="col col--6 margin-bottom--lg">
|
||||
<a class="card padding--lg cardContainer" href="/platform-announcements">
|
||||
<h2 class="text--truncate cardTitle" title="Platform Announcements">Platform Announcements</h2>
|
||||
</a></article>
|
||||
<article class="col col--6 margin-bottom--lg">
|
||||
<a class="card padding--lg cardContainer" href="/service-agreement/gitlink-service-agreement">
|
||||
<h2 class="text--truncate cardTitle" title="Service Agreement">Service Agreement</h2>
|
||||
<p>GitLink Service Agreement [1 document]</p>
|
||||
</a></article>
|
||||
</section>
|
||||
</div>
|
||||
</div>
|
||||
|
|
@ -0,0 +1,7 @@
|
|||
{
|
||||
"label": "Issues",
|
||||
"position": 4,
|
||||
"link": {
|
||||
"type": "generated-index"
|
||||
}
|
||||
}
|
||||
|
|
@ -0,0 +1,19 @@
|
|||
---
|
||||
sidebar_label: 'Comments and Operation Records'
|
||||
sidebar_position: 5
|
||||
---
|
||||
|
||||
# Comments and Operation Records
|
||||
|
||||
### Comments
|
||||
Each issue functions like a progress-trackable post, therefore supporting comments and replies. Not just project members, but everyone can comment and reply on an issue, asking questions or sharing insights for discussion.
|
||||

|
||||
|
||||
### Issue Declaration
|
||||
Users can publish an "Issue Declaration" on any issue, stating their approach to resolving the issue. Click "Declaration" on the right side of the issue details, edit your message, and click "Confirm" to publish the declaration, as shown below:
|
||||

|
||||
|
||||
### Operation Records
|
||||
Anyone can create issues, but note that non-project members can only modify issues they created, while project members have permission to modify all issues.
|
||||
All editing operations for an issue, including **creating issue, adding assignee, removing assignee, changing status, changing priority, adding label, removing label, adding milestone, removing milestone, setting related branch, removing related branch, setting start date, and setting end date**, are recorded in the operation records.
|
||||

|
||||
|
|
@ -0,0 +1,20 @@
|
|||
---
|
||||
sidebar_label: 'Create Issue'
|
||||
sidebar_position: 2
|
||||
---
|
||||
|
||||
# Create Issue
|
||||
|
||||
1. Enter the "**Repository**" interface of the project where you want to publish an issue, and click the "**+ Issue**" button at the top to enter the issue creation interface, as shown below:
|
||||
|
||||

|
||||
|
||||
2. Start creating the issue, including the issue title and content. When entering the issue content, you can use the simple and flexible [Markdown syntax](https://markdown.com.cn/), and you can also click the function buttons above. Then upload any necessary attachments. Finally, click the "**Create**" button to submit your first issue 🎉🎉🎉
|
||||
|
||||

|
||||
|
||||
3. Additionally, when creating an issue, you can quickly add references to other issues using the **`#`** symbol to provide supplementary information for the current issue. As shown below, after typing **`#`**, a list of referenceable issues will appear. You can scroll down with your mouse or enter the issue number to select the issue you want to reference, and a link 🔗 to the referenced issue will be automatically added.
|
||||
|
||||

|
||||
|
||||

|
||||
|
|
@ -0,0 +1,93 @@
|
|||
---
|
||||
sidebar_label: "Issues Overview"
|
||||
title: "Issues Overview"
|
||||
---
|
||||
|
||||
# Issues Management
|
||||
|
||||
Issues in GitLink help you track bugs, enhancements, tasks, and other repository-related work.
|
||||
|
||||
## Issue Features
|
||||
|
||||
1. **Issue Creation**
|
||||
- Title and description
|
||||
- Labels and milestones
|
||||
- Assignees
|
||||
- Priority levels
|
||||
- Due dates
|
||||
|
||||
2. **Issue Templates**
|
||||
- Bug report template
|
||||
- Feature request template
|
||||
- Custom templates
|
||||
- Template configuration
|
||||
|
||||
3. **Issue Management**
|
||||
- Status tracking
|
||||
- Comments and discussions
|
||||
- File attachments
|
||||
- Mentions and notifications
|
||||
- Related issues linking
|
||||
|
||||
## Issue Organization
|
||||
|
||||
1. **Labels**
|
||||
- Bug/Feature/Documentation
|
||||
- Priority levels
|
||||
- Status indicators
|
||||
- Custom labels
|
||||
|
||||
2. **Milestones**
|
||||
- Group related issues
|
||||
- Set deadlines
|
||||
- Track progress
|
||||
- Release planning
|
||||
|
||||
3. **Projects**
|
||||
- Kanban boards
|
||||
- Sprint planning
|
||||
- Progress tracking
|
||||
- Team coordination
|
||||
|
||||
## Best Practices
|
||||
|
||||
1. **Issue Creation**
|
||||
- Clear titles
|
||||
- Detailed descriptions
|
||||
- Reproducible steps
|
||||
- Expected behavior
|
||||
- Actual behavior
|
||||
|
||||
2. **Issue Management**
|
||||
- Regular updates
|
||||
- Prompt responses
|
||||
- Clear communication
|
||||
- Proper closure
|
||||
|
||||
3. **Issue Organization**
|
||||
- Consistent labeling
|
||||
- Milestone planning
|
||||
- Project board usage
|
||||
- Regular triage
|
||||
|
||||
## Working with Issues
|
||||
|
||||
1. **Creating Issues**
|
||||
- Choose template
|
||||
- Fill required information
|
||||
- Add labels
|
||||
- Assign to team members
|
||||
|
||||
2. **Managing Issues**
|
||||
- Update status
|
||||
- Add comments
|
||||
- Link related issues
|
||||
- Track progress
|
||||
|
||||
## Need Help?
|
||||
|
||||
For assistance with issues:
|
||||
|
||||
1. Check our [issues guide](/issues)
|
||||
2. Contact [support](/feedback)
|
||||
3. Join community discussions
|
||||
|
|
@ -0,0 +1,18 @@
|
|||
---
|
||||
sidebar_label: 'Introduction to Issues'
|
||||
sidebar_position: 1
|
||||
---
|
||||
|
||||
# Introduction to Issues
|
||||
|
||||
The **Issue Management** module primarily provides project team members with services for publishing, assigning, and tracking **development tasks**.
|
||||
|
||||

|
||||
|
||||
**Important Notes**
|
||||
|
||||
1. An **Issue** is a post that can track development task progress, therefore it supports participant replies and comments, as detailed in the ***Comments and Operation Records*** section;
|
||||
|
||||
2. The default types (labels) of **Issues** include Bug, Feature, Task, Support, Weekly Report, etc., as detailed in the ***Label Management*** section;
|
||||
|
||||
3. You can set start and end times for **Issues** and assign responsible persons for resolving the tasks. One day before the issue deadline, the system will automatically send reminder messages to both the issue creator and the assignee.
|
||||
|
|
@ -0,0 +1,14 @@
|
|||
---
|
||||
sidebar_label: 'Issue List'
|
||||
sidebar_position: 4
|
||||
---
|
||||
|
||||
# Issue List
|
||||
|
||||
All issues created during the project development process can be viewed in the **Issues** interface. The image below shows the issue list from the [GitLink Open Source](https://www.gitlink.org.cn/Gitlink/forgeplus) project.
|
||||
|
||||

|
||||
|
||||
+ **Create Issue**: On the issue list interface, you can also create issues by clicking the "**Create Issue**" button, as detailed in the ***Create Issue*** section;
|
||||
|
||||
+ **Filter Issues**: The issue list supports filtering by various conditions, including creator, labels (see ***Label Management*** section), milestones (see ***Milestone Management*** section), assignee, status, and start/end dates. It also supports keyword search and sorting issues by multiple sorting rules.
|
||||
|
|
@ -0,0 +1,24 @@
|
|||
---
|
||||
sidebar_label: 'Label Management'
|
||||
sidebar_position: 6
|
||||
---
|
||||
|
||||
# Label Management
|
||||
|
||||
On the issue content editing page, you can set labels according to the type of issue. Labels facilitate filtering target issues in the issue list, improving project development management efficiency.<br/>
|
||||
GitLink provides ten default label types: Bug, Feature, Question, Support, Task, Help Wanted, On Hold, Documentation, Testing, and Duplicate, each with different meanings and color indicators:
|
||||
|
||||
- **Bug:** Indicates unexpected problems or errors;
|
||||
- **Feature:** Indicates new feature requests;
|
||||
- **Question:** Indicates confusion or queries;
|
||||
- **Support:** Indicates specific functionality or requirements;
|
||||
- **Task:** Indicates tasks that need to be assigned;
|
||||
- **Help Wanted:** Indicates need for community user assistance;
|
||||
- **On Hold:** Indicates this issue will not be processed for now;
|
||||
- **Documentation:** Indicates documentation material supplements;
|
||||
- **Testing:** Indicates requirements that need testing;
|
||||
- **Duplicate:** Indicates similar issues already exist.
|
||||

|
||||
|
||||
Additionally, **project members** can modify label meanings or color indicators, create new labels, and delete labels according to their needs or preferences.
|
||||

|
||||
|
|
@ -0,0 +1,34 @@
|
|||
---
|
||||
sidebar_label: 'Milestone Management'
|
||||
sidebar_position: 7
|
||||
---
|
||||
|
||||
# Milestone Management
|
||||
|
||||
### Introduction to Milestones
|
||||
Milestones primarily support project teams in project development and version releases, with each milestone capable of being associated with multiple development tasks.
|
||||
|
||||
### Creating Milestones
|
||||
Project members can create milestones following these steps:
|
||||
1. Enter the **"Milestones"** interface of the target project, where you'll see a list of created milestones, categorized as either **"Closed"** or **"Open"**;
|
||||
2. Click the **"+ Create Milestone"** button at the top to enter the milestone creation interface;
|
||||

|
||||
|
||||
3. Fill in the title (required), description (required), due date (optional), then click **"Create Milestone"** in the bottom right to complete the creation of a new milestone.
|
||||

|
||||
|
||||
### Associating Milestones
|
||||
Project members can associate issues with milestones to create clear issue lists within milestones, following these main steps:
|
||||
1. Click on the target issue in the issue list;
|
||||
2. Edit the "Milestone" property and select the milestone to associate with.
|
||||

|
||||
|
||||
### Other Operations
|
||||
- **Open Milestone**
|
||||
- **Close Milestone**
|
||||
- **Edit Milestone**
|
||||
- **Delete Milestone**
|
||||
|
||||
All of the above operations can be performed on target milestones from the milestone list, as shown in the images below:
|
||||

|
||||

|
||||
|
|
@ -0,0 +1,20 @@
|
|||
---
|
||||
sidebar_label: 'Issue Status Changes'
|
||||
sidebar_position: 3
|
||||
---
|
||||
|
||||
# Issue Status Changes
|
||||
|
||||
An **Issue** is essentially a development task, and as development activities progress, its status changes. "**Status**" is used to track and record these changes in development activities. As shown in the image, GitLink issues have five **status** types: "New", "In Progress", "Resolved", "Closed", and "Rejected", which indicate the progress of development task handling.
|
||||
|
||||

|
||||
|
||||
+ **New**: Newly created issues have a default status of "New";
|
||||
|
||||
+ **In Progress**: When an existing issue is being worked on, its status can be changed to "In Progress";
|
||||
|
||||
+ **Resolved**: When an issue has been resolved by developers, its status can be changed to "Resolved" ✅;
|
||||
|
||||
+ **Closed**: Issues that have been resolved or no longer need to remain open can be set to "Closed";
|
||||
|
||||
+ **Rejected**: If the developer assigned to resolve the issue refuses to handle it, the issue can be set to "Rejected" status ❌.
|
||||
|
|
@ -0,0 +1,96 @@
|
|||
---
|
||||
sidebar_label: "Notifications Overview"
|
||||
title: "Notifications System Overview"
|
||||
---
|
||||
|
||||
# Notifications System
|
||||
|
||||
Stay informed about activities and updates in your GitLink projects through our comprehensive notification system.
|
||||
|
||||
## Notification Types
|
||||
|
||||
1. **Repository Notifications**
|
||||
- Push events
|
||||
- Pull requests
|
||||
- Issue updates
|
||||
- Comments
|
||||
- Mentions
|
||||
|
||||
2. **System Notifications**
|
||||
- Security alerts
|
||||
- System updates
|
||||
- Maintenance notices
|
||||
- Account activities
|
||||
- Team invitations
|
||||
|
||||
## Notification Settings
|
||||
|
||||
1. **Global Settings**
|
||||
- Email preferences
|
||||
- Web notifications
|
||||
- Mobile push notifications
|
||||
- Notification frequency
|
||||
- Quiet hours
|
||||
|
||||
2. **Repository-specific Settings**
|
||||
- Watch/Unwatch repositories
|
||||
- Custom rules
|
||||
- Event filters
|
||||
- Team notifications
|
||||
- Branch updates
|
||||
|
||||
## Configuration Options
|
||||
|
||||
1. **Delivery Methods**
|
||||
- Email
|
||||
- Web browser
|
||||
- Mobile app
|
||||
- Desktop notifications
|
||||
- Webhook integrations
|
||||
|
||||
2. **Notification Rules**
|
||||
- Priority levels
|
||||
- Custom filters
|
||||
- Time-based rules
|
||||
- Team rules
|
||||
- Muting options
|
||||
|
||||
## Best Practices
|
||||
|
||||
1. **Managing Notifications**
|
||||
- Set clear priorities
|
||||
- Use filters effectively
|
||||
- Regular cleanup
|
||||
- Team coordination
|
||||
- Response protocols
|
||||
|
||||
2. **Optimization**
|
||||
- Reduce noise
|
||||
- Focus on important updates
|
||||
- Organize by project
|
||||
- Set up workflows
|
||||
- Automate responses
|
||||
|
||||
## Integration Features
|
||||
|
||||
1. **Third-party Integration**
|
||||
- Slack
|
||||
- Microsoft Teams
|
||||
- Discord
|
||||
- Custom webhooks
|
||||
- Email services
|
||||
|
||||
2. **Advanced Features**
|
||||
- Custom templates
|
||||
- Batch processing
|
||||
- Scheduled digests
|
||||
- Analytics
|
||||
- Archive options
|
||||
|
||||
## Need Help?
|
||||
|
||||
For assistance with notifications:
|
||||
|
||||
1. Review [notification settings](/notifications)
|
||||
2. Contact [support team](/feedback)
|
||||
3. Join community discussions
|
||||
|
|
@ -0,0 +1,7 @@
|
|||
{
|
||||
"label": "Organization Management",
|
||||
"position": 3,
|
||||
"link": {
|
||||
"type": "generated-index"
|
||||
}
|
||||
}
|
||||
|
|
@ -0,0 +1,32 @@
|
|||
---
|
||||
sidebar_label: 'Organization Creation and Settings'
|
||||
sidebar_position: 2
|
||||
---
|
||||
|
||||
# Organization Creation
|
||||
|
||||
To create a new organization, click the "+" symbol in the top navigation bar on the *https://www.gitlink.org.cn* page.
|
||||
|
||||

|
||||
|
||||
On the creation page, enter the **Organization Account**, **Organization Name**, **Organization Description**, **Location**, **Visibility**, and **Organization Avatar**. Then click the "**Create Organization**" button to complete the organization creation.
|
||||
|
||||

|
||||
|
||||
## Organization Account
|
||||
|
||||

|
||||
|
||||
**Note**: Can only use letters or numbers to start, and can contain letters, numbers, underscores, and hyphens, with a length of 4 to 20 characters
|
||||
|
||||
## Organization Name and Description
|
||||
|
||||

|
||||
|
||||
**Note**: These fields are required and cannot be empty
|
||||
|
||||
## Visibility
|
||||
|
||||

|
||||
|
||||
**Note**: Three preset visibility types are available: Public, Restricted (visible only to logged-in users), and Private (visible only to organization members).
|
||||
|
|
@ -0,0 +1,79 @@
|
|||
---
|
||||
sidebar_label: "Organization Overview"
|
||||
title: "Organization Overview"
|
||||
---
|
||||
|
||||
# Organization Management
|
||||
|
||||
Organizations in GitLink provide a collaborative space for teams to work together on multiple projects.
|
||||
|
||||
## Organization Features
|
||||
|
||||
1. **Team Management**
|
||||
- Create and manage teams
|
||||
- Assign team roles and permissions
|
||||
- Manage team members
|
||||
- Set team access levels
|
||||
|
||||
2. **Repository Management**
|
||||
- Create organization repositories
|
||||
- Transfer repositories
|
||||
- Manage repository access
|
||||
- Set repository visibility
|
||||
|
||||
3. **Member Management**
|
||||
- Invite new members
|
||||
- Assign member roles
|
||||
- Manage permissions
|
||||
- Remove members
|
||||
|
||||
## Organization Roles
|
||||
|
||||
1. **Owner**
|
||||
- Full administrative access
|
||||
- Manage organization settings
|
||||
- Add/remove members
|
||||
- Delete organization
|
||||
|
||||
2. **Administrator**
|
||||
- Manage team settings
|
||||
- Manage repositories
|
||||
- Add/remove team members
|
||||
|
||||
3. **Member**
|
||||
- Access assigned repositories
|
||||
- Participate in team activities
|
||||
- Create and manage issues
|
||||
|
||||
## Best Practices
|
||||
|
||||
1. **Organization Structure**
|
||||
- Create clear team hierarchies
|
||||
- Define team responsibilities
|
||||
- Document access policies
|
||||
|
||||
2. **Security**
|
||||
- Regular access review
|
||||
- Two-factor authentication
|
||||
- IP allow lists
|
||||
|
||||
3. **Collaboration**
|
||||
- Team communication channels
|
||||
- Project documentation
|
||||
- Code review guidelines
|
||||
|
||||
## Getting Started
|
||||
|
||||
1. Create an organization
|
||||
2. Set up teams
|
||||
3. Invite members
|
||||
4. Configure repositories
|
||||
5. Establish workflows
|
||||
|
||||
## Need Help?
|
||||
|
||||
For assistance with organization management:
|
||||
|
||||
1. Review our [detailed guides](/organization-management)
|
||||
2. Contact [support team](/feedback)
|
||||
3. Join community discussions
|
||||
|
|
@ -0,0 +1,28 @@
|
|||
---
|
||||
sidebar_label: 'Organization Introduction'
|
||||
sidebar_position: 1
|
||||
---
|
||||
|
||||
# Organization Introduction
|
||||
|
||||
Organizations are shared accounts where businesses and open source projects can collaborate across multiple projects simultaneously, with sophisticated security and administrative features. Multiple individual accounts can collaborate on shared projects by joining the same organization account.
|
||||
|
||||
Your team can collaborate on GitLink using an organization account, which serves as a container for shared work and gives your work a unique name and brand. Additionally, the platform supports organizations in publishing news updates, displaying project overviews, and repository details on the "Organization Details" page.
|
||||
|
||||

|
||||
|
||||
## As an Organization Owner
|
||||
|
||||
Effective organization management is your mission.
|
||||
|
||||
Organizations provide a centralized hub for collaboration and sharing, enabling your team to work together, share resources, and communicate more effectively.
|
||||
|
||||
To simplify access management and enhance collaboration, you can create nested teams that reflect your organizational structure. You can group people based on their roles or projects and assign tasks accordingly.
|
||||
|
||||

|
||||
|
||||
The platform also supports organization owners in managing customized settings for data access.
|
||||
|
||||
## As an Organization Member
|
||||
|
||||
Through organizations, you can collaborate with an unlimited number of people across multiple projects, working together with like-minded individuals through division of labor and collaboration, participating in development processes, and publishing or handling issues.
|
||||
|
|
@ -0,0 +1,23 @@
|
|||
---
|
||||
sidebar_label: 'Member Management'
|
||||
sidebar_position: 4
|
||||
---
|
||||
|
||||
# Member Management
|
||||
|
||||
You can access the member management interface through **Repository Settings** > **Member Management** in your managed projects.
|
||||
|
||||

|
||||
|
||||
## Member Search and Addition
|
||||
In the member management interface, you can search for and add organization members.
|
||||
|
||||

|
||||
|
||||
## Member Invitation Permission Settings
|
||||
Administrators can configure permissions for inviting members.
|
||||

|
||||
|
||||
Additionally, you can copy invitation links for a more convenient way to invite members to join the project.
|
||||
|
||||
**Note**: This feature is only visible to administrators
|
||||
|
|
@ -0,0 +1,12 @@
|
|||
---
|
||||
sidebar_label: 'Project Management'
|
||||
sidebar_position: 5
|
||||
---
|
||||
|
||||
## Create Organization Project
|
||||
|
||||
Click the "New Project" button on the organization information page to create a hosted project or mirror project for that organization.
|
||||
|
||||

|
||||
|
||||
**Note**: In the "Owner" dropdown menu, you can select: Individual, Organization, or Team
|
||||
|
|
@ -0,0 +1,32 @@
|
|||
---
|
||||
sidebar_label: 'Team Management'
|
||||
sidebar_position: 3
|
||||
---
|
||||
|
||||
# Organization Team Management
|
||||
|
||||
## Create Organization Team
|
||||
Click the "New Team" button on the organization information page to create a team for that organization (the platform creates an "Owners" team by default, with the organization creator as a member).
|
||||
|
||||
On the team creation page, enter the team identifier, team name, team description, project permissions, and repository permissions. Then click "Create Team" to complete the team creation.
|
||||
|
||||

|
||||
|
||||
## View Organization Teams
|
||||
|
||||
Click on a team name on the organization information page to view detailed information about that team. This page includes the team's name, description, and other information, as well as lists of associated members and projects.
|
||||
|
||||

|
||||
|
||||
## Manage Organization Teams
|
||||
|
||||
Click the "Team Settings" button on the team information page to manage the team
|
||||
|
||||
- Basic Settings: Modify basic project information, such as name and description.
|
||||

|
||||
|
||||
- Team Member Management: Add new members to the team or remove existing members.
|
||||

|
||||
|
||||
- Team Project Management: Associate new projects with the team (projects already created by the organization) or remove associated projects.
|
||||

|
||||
|
|
@ -0,0 +1,96 @@
|
|||
---
|
||||
sidebar_label: "Personal Homepage Setup"
|
||||
title: "Setting Up Your Personal Homepage"
|
||||
---
|
||||
|
||||
# Personal Homepage Setup
|
||||
|
||||
Create and customize your personal homepage on GitLink to showcase your projects and contributions.
|
||||
|
||||
## Getting Started
|
||||
|
||||
1. **Basic Setup**
|
||||
- Enable homepage feature
|
||||
- Choose template
|
||||
- Configure domain
|
||||
- Set visibility
|
||||
- Basic information
|
||||
|
||||
2. **Content Sections**
|
||||
- Profile information
|
||||
- Project showcase
|
||||
- Activity timeline
|
||||
- Skills and expertise
|
||||
- Contact information
|
||||
|
||||
## Customization
|
||||
|
||||
1. **Design Options**
|
||||
- Theme selection
|
||||
- Color schemes
|
||||
- Layout options
|
||||
- Typography
|
||||
- Custom CSS
|
||||
|
||||
2. **Content Management**
|
||||
- Project highlights
|
||||
- Blog posts
|
||||
- Portfolio items
|
||||
- Achievement badges
|
||||
- Social links
|
||||
|
||||
## Features
|
||||
|
||||
1. **Core Components**
|
||||
- About section
|
||||
- Project gallery
|
||||
- Blog integration
|
||||
- Contact form
|
||||
- Analytics
|
||||
|
||||
2. **Advanced Features**
|
||||
- Custom domain
|
||||
- SEO optimization
|
||||
- Multi-language support
|
||||
- RSS feeds
|
||||
- Social sharing
|
||||
|
||||
## Best Practices
|
||||
|
||||
1. **Content Strategy**
|
||||
- Regular updates
|
||||
- Quality content
|
||||
- Clear organization
|
||||
- Professional tone
|
||||
- Engaging visuals
|
||||
|
||||
2. **Performance**
|
||||
- Image optimization
|
||||
- Fast loading
|
||||
- Mobile responsiveness
|
||||
- Browser compatibility
|
||||
- SEO best practices
|
||||
|
||||
## Maintenance
|
||||
|
||||
1. **Regular Updates**
|
||||
- Content freshness
|
||||
- Project updates
|
||||
- Security patches
|
||||
- Performance monitoring
|
||||
- Backup management
|
||||
|
||||
2. **Analytics and Tracking**
|
||||
- Visitor statistics
|
||||
- Page performance
|
||||
- User engagement
|
||||
- Traffic sources
|
||||
- Conversion tracking
|
||||
|
||||
## Need Help?
|
||||
|
||||
For assistance with your personal homepage:
|
||||
|
||||
1. Check our [homepage guide](/personal-homepage)
|
||||
2. Contact [support team](/feedback)
|
||||
3. Join community discussions
|
||||
|
|
@ -0,0 +1,98 @@
|
|||
---
|
||||
sidebar_label: "Platform Announcements"
|
||||
title: "Platform Announcements"
|
||||
---
|
||||
|
||||
# Platform Announcements
|
||||
|
||||
Stay updated with the latest news, updates, and announcements from GitLink.
|
||||
|
||||
## Announcement Categories
|
||||
|
||||
1. **System Updates**
|
||||
- Feature releases
|
||||
- Security updates
|
||||
- Performance improvements
|
||||
- Bug fixes
|
||||
- Infrastructure changes
|
||||
|
||||
2. **Service Notifications**
|
||||
- Planned maintenance
|
||||
- Service disruptions
|
||||
- Emergency updates
|
||||
- Status changes
|
||||
- API updates
|
||||
|
||||
## Important Information
|
||||
|
||||
1. **Platform Status**
|
||||
- Current status
|
||||
- Upcoming maintenance
|
||||
- Known issues
|
||||
- Resolution progress
|
||||
- Service metrics
|
||||
|
||||
2. **Feature Updates**
|
||||
- New features
|
||||
- Improvements
|
||||
- Deprecations
|
||||
- Beta programs
|
||||
- Roadmap updates
|
||||
|
||||
## Community News
|
||||
|
||||
1. **Events and Programs**
|
||||
- Community events
|
||||
- Hackathons
|
||||
- Webinars
|
||||
- Training sessions
|
||||
- User meetups
|
||||
|
||||
2. **Community Highlights**
|
||||
- Success stories
|
||||
- Project spotlights
|
||||
- User achievements
|
||||
- Team recognition
|
||||
- Partnership news
|
||||
|
||||
## Security Announcements
|
||||
|
||||
1. **Security Updates**
|
||||
- Security patches
|
||||
- Vulnerability fixes
|
||||
- Best practices
|
||||
- Advisory notices
|
||||
- Compliance updates
|
||||
|
||||
2. **Privacy Updates**
|
||||
- Policy changes
|
||||
- Data handling
|
||||
- User controls
|
||||
- Compliance
|
||||
- Privacy features
|
||||
|
||||
## Service Updates
|
||||
|
||||
1. **API Changes**
|
||||
- New endpoints
|
||||
- Deprecations
|
||||
- Version updates
|
||||
- Documentation
|
||||
- Migration guides
|
||||
|
||||
2. **Integration Updates**
|
||||
- New integrations
|
||||
- Partner updates
|
||||
- Tool changes
|
||||
- Service connections
|
||||
- Platform plugins
|
||||
|
||||
## Stay Informed
|
||||
|
||||
To keep up with our announcements:
|
||||
|
||||
1. Follow our [updates](/platform-announcements)
|
||||
2. Subscribe to our newsletter
|
||||
3. Follow us on social media
|
||||
4. Enable notifications
|
||||
5. Join our community channels
|
||||
|
|
@ -0,0 +1,7 @@
|
|||
{
|
||||
"label": "Pull Requests",
|
||||
"position": 5,
|
||||
"link": {
|
||||
"type": "generated-index"
|
||||
}
|
||||
}
|
||||
|
|
@ -0,0 +1,14 @@
|
|||
---
|
||||
sidebar_label: 'Code Review'
|
||||
sidebar_position: 3
|
||||
---
|
||||
|
||||
# Code Review
|
||||
|
||||
### **1. Enter Code Review**
|
||||
As shown in the image below, click the "Code Review" button to enter the code review interface
|
||||
<br/>
|
||||
|
||||
### **2. Code Review Interface**
|
||||
As shown in the image below, users can view the new code to be merged in this PR operation and conduct their review on this interface.
|
||||
<br/>
|
||||
|
|
@ -0,0 +1,22 @@
|
|||
---
|
||||
sidebar_label: 'Create Pull Request'
|
||||
sidebar_position: 2
|
||||
---
|
||||
|
||||
# Create Pull Request
|
||||
|
||||
1. Enter the "**Pull Requests (PR)**" interface of the project where you want to initiate a pull request, click the "**New Pull Request**" button at the top to enter the pull request creation interface, as shown below:
|
||||
|
||||

|
||||
|
||||

|
||||
|
||||
2. Select the **source branch** and **target branch** to be merged. The source branch is the one that has completed code development and needs its code changes merged, while the target branch is where the code changes will be merged into. This can be either another branch (branch) under the same repository or a branch under the forked source repository;
|
||||
|
||||
3. After selecting the branches, fill in the title and description of this pull request to provide information that helps reviewers understand this pull request, thus speeding up the review process (see ***Code Review*** section);
|
||||
|
||||
4. Additionally, users can specify reviewers, add milestones, labels, and priority in the right sidebar (a pull request is essentially an issue, so these operations have the same or similar meanings as those in the Issues module, you can refer to the Issues chapter for better understanding);
|
||||
|
||||
5. Finally, after completing all the information, click the "**Create**" button at the bottom to submit your first pull request 🎉🎉🎉!
|
||||
|
||||

|
||||
|
|
@ -0,0 +1,88 @@
|
|||
---
|
||||
sidebar_label: "Pull Requests Overview"
|
||||
title: "Pull Requests Overview"
|
||||
---
|
||||
|
||||
# Pull Requests
|
||||
|
||||
Pull Requests (PRs) in GitLink enable collaborative code review and project contribution.
|
||||
|
||||
## Understanding Pull Requests
|
||||
|
||||
1. **What is a Pull Request?**
|
||||
- Code change proposal
|
||||
- Review mechanism
|
||||
- Discussion platform
|
||||
- Merge preparation
|
||||
|
||||
2. **When to Create a PR**
|
||||
- New feature implementation
|
||||
- Bug fixes
|
||||
- Documentation updates
|
||||
- Code improvements
|
||||
|
||||
## Creating Pull Requests
|
||||
|
||||
1. **Basic Steps**
|
||||
- Fork the repository
|
||||
- Create a new branch
|
||||
- Make changes
|
||||
- Submit pull request
|
||||
- Respond to reviews
|
||||
|
||||
2. **PR Content**
|
||||
- Clear title
|
||||
- Detailed description
|
||||
- Related issues
|
||||
- Testing information
|
||||
- Screenshots (if applicable)
|
||||
|
||||
## Review Process
|
||||
|
||||
1. **Code Review**
|
||||
- Automated checks
|
||||
- Manual review
|
||||
- Discussion threads
|
||||
- Change requests
|
||||
- Approval process
|
||||
|
||||
2. **Best Practices**
|
||||
- Small, focused changes
|
||||
- Clear documentation
|
||||
- Test coverage
|
||||
- Code style compliance
|
||||
- Timely responses
|
||||
|
||||
## Merging Options
|
||||
|
||||
1. **Merge Methods**
|
||||
- Standard merge
|
||||
- Squash and merge
|
||||
- Rebase and merge
|
||||
|
||||
2. **Pre-merge Checks**
|
||||
- CI/CD pipeline
|
||||
- Code review approval
|
||||
- Branch protection rules
|
||||
- Conflict resolution
|
||||
|
||||
## After Merging
|
||||
|
||||
1. **Clean-up**
|
||||
- Delete branch
|
||||
- Close related issues
|
||||
- Update documentation
|
||||
- Deploy changes
|
||||
|
||||
2. **Follow-up**
|
||||
- Monitor changes
|
||||
- Address feedback
|
||||
- Update dependencies
|
||||
|
||||
## Need Help?
|
||||
|
||||
For assistance with pull requests:
|
||||
|
||||
1. Review our [PR guidelines](/pull-requests)
|
||||
2. Contact [support team](/feedback)
|
||||
3. Join community discussions
|
||||
|
|
@ -0,0 +1,18 @@
|
|||
---
|
||||
sidebar_label: 'Introduction to Pull Requests'
|
||||
sidebar_position: 1
|
||||
---
|
||||
|
||||
# Introduction to Pull Requests
|
||||
|
||||
A **Pull Request (PR)** is a method of merging code changes between two software repositories in modern distributed software development. It's typically used to submit code changes from a forked repository to its source repository, and it's also an excellent way for team collaboration in team projects or open source projects. When you pull and modify code from someone else's repository, then notify the original repository's administrator of your changes and request them to merge your modifications, this process is called a **Pull Request**.
|
||||
|
||||
The **Pull Request (PR)** module in GitLink provides two main functionalities for pull request creation and management:
|
||||
|
||||
- On one hand, it supports creating (initiating) code merge requests to the source repository or other branches within the same repository;
|
||||
|
||||
- On the other hand, it allows repository administrators to manage, review, and ultimately decide whether to incorporate pull requests sent to their repository by others.
|
||||
|
||||
The Pull Request (PR) management module is shown in the image below:
|
||||
|
||||

|
||||
|
|
@ -0,0 +1,6 @@
|
|||
---
|
||||
sidebar_label: 'Linking Issues to Pull Requests'
|
||||
sidebar_position: 5
|
||||
---
|
||||
|
||||
# Linking Issues to Pull Requests
|
||||
|
|
@ -0,0 +1,98 @@
|
|||
---
|
||||
sidebar_label: 'Introduction to Merge Modes'
|
||||
sidebar_position: 4
|
||||
---
|
||||
|
||||
# Introduction to Merge Modes
|
||||
|
||||
After reviewers have reviewed the code changes submitted by developers, they can decide whether to merge these commits into the main branch `master`.
|
||||
|
||||
However, there are multiple merge modes for merging commits between different branches. The image below shows the merge modes supported by GitLink, including **Merge Pull Request**, **Rebase and Merge**, **Rebase and Merge --no-ff**, and **Squash and Merge**.
|
||||
|
||||

|
||||
|
||||
1. **Merge Pull Request**
|
||||
|
||||
**Merge Pull Request** is the most commonly used merge mode. Taking the following diagram as an example, the developer created a development branch `dev` from commit 3 of the main branch `master`, then made commits A, B, and C, and then merged back to the `master` branch.
|
||||
|
||||
Before fast-forward merge:
|
||||
|
||||

|
||||
|
||||
After fast-forward merge:
|
||||
|
||||

|
||||
|
||||
**Note**: As you can see, the merge process simply moves the `master` pointer to where the `dev` pointer is. This type of merge is called **fast-forward**. This occurs because after commit 3, there were no new commits on the `master` branch, so the merge can be completed by simply fast-forwarding the `master` pointer. However, if there are new commits on the `master` branch, a substantive merge will be needed, as shown in the following two images:
|
||||
|
||||
Before merging, commit 4 was made on the `master` branch after commit A but before commit B on the `dev` branch. In this case, merging the `dev` branch cannot be done by simple fast-forward movement; instead, the changes on both branches need to be compared and merged.
|
||||
|
||||
Before non-fast-forward merge:
|
||||
|
||||

|
||||
|
||||
After merging, commits A, B, and C will be added to `master`'s commit history according to the timeline, and a new commit D will be generated to record the merge event. Additionally, if conflicts occur during the merge (i.e., both branches modified the same file), they need to be resolved manually. This merge method is called **non-fast-forward**, and it's the default method in **Merge Pull Request** mode!
|
||||
|
||||
After non-fast-forward merge:
|
||||
|
||||

|
||||
|
||||
For better understanding, you can view the commit history on the `master` branch linearly:
|
||||
|
||||

|
||||
|
||||
**Summary**: In **Merge Pull Request** mode, **non-fast-forward** merge is used by default to merge development branches into the `master` branch, and the **non-fast-forward** method generates a special commit to record this merge event!
|
||||
|
||||
2. **Rebase and Merge**
|
||||
|
||||
From the commit history on the `master` branch after **Merge Pull Request**, we can see that the commit histories of the two branches might interweave, which could cause confusion in subsequent development. **Rebase and Merge** can solve this problem.
|
||||
|
||||
**Rebase and Merge** includes two operations: **rebase** and **merge**. First is rebase: taking the diagram below as an example, the `dev` branch was created from commit 3, so commit 3 is the base of `dev`. The rebase operation changes the base of `dev` to the latest commit on the `master` branch. Of course, conflicts may occur during rebasing and need to be resolved manually.
|
||||
|
||||
Before rebase:
|
||||
|
||||

|
||||
|
||||
After rebase, before merge:
|
||||
|
||||

|
||||
|
||||
After the `dev` branch is rebased, there are no "newer" commits on the `master` branch, so performing a merge at this point gives us the following result:
|
||||
|
||||
After merge:
|
||||
|
||||

|
||||
|
||||
**Summary**: In **Rebase and Merge** mode, the development branch `dev` can first perform a rebase operation, making its commits appear as if they were made based on the latest commit of the `master` branch, then merge back to the `master` branch using **fast-forward**, thus organizing the commit history!
|
||||
|
||||
3. **Rebase and Merge --no-ff**
|
||||
|
||||
Because **Rebase and Merge** uses **fast-forward** mode by default when merging, there won't be a special commit on the `master` branch to record this merge event. Therefore, you can use the `--no-ff` (**no fast-forward**) option to specify using **non-fast-forward** mode for merging.
|
||||
|
||||
Before --no-ff merge:
|
||||
|
||||

|
||||
|
||||
After --no-ff merge:
|
||||
|
||||

|
||||
|
||||
**Summary**: Using the `--no-ff` option explicitly declares using **non-fast-forward** mode when merging, which adds a commit to record the merge event in the `master` branch!
|
||||
|
||||
4. **Squash and Merge**
|
||||
|
||||
In development branches like `dev` or `feature`, developers might make multiple commits to complete a requirement. However, these granular commit messages can make the commit history on `master` cluttered and confusing after merging. Therefore, these commits need to be squashed before merging. As shown in the image, the squash operation is performed on the `master` branch. Essentially, it applies the changes made on the `dev` branch to the files maintained by the `master` branch, then saves these modifications with a new commit 5, and finally commits.
|
||||
|
||||
Before squash:
|
||||
|
||||

|
||||
|
||||
After squash, before commit:
|
||||
|
||||

|
||||
|
||||
After commit:
|
||||
|
||||

|
||||
|
||||
**Summary**: Squashing the granular commits on the development branch before merging can make the commit history on the `master` branch more concise. However, note that this merge mode essentially saves the changes from `dev` to `master` in one go and creates a new commit to record these changes, so the committer changes!
|
||||
|
|
@ -0,0 +1,7 @@
|
|||
{
|
||||
"label": "Quick Start",
|
||||
"position": 2,
|
||||
"link": {
|
||||
"type": "generated-index"
|
||||
}
|
||||
}
|
||||
|
|
@ -0,0 +1,24 @@
|
|||
---
|
||||
sidebar_label: 'Commit Your First Code'
|
||||
sidebar_position: 3
|
||||
---
|
||||
|
||||
# Commit Your First Code
|
||||
|
||||
# 1. Edit Code
|
||||
|
||||
Click the edit button to start editing code.
|
||||
|
||||

|
||||
|
||||
# 2. Commit Code
|
||||
|
||||
Write your code in the editor, then fill in the change description and submit the changes.
|
||||
|
||||

|
||||
|
||||
## 3. Code Update Successful
|
||||
|
||||
After successful submission, the code update is complete.
|
||||
|
||||

|
||||
|
|
@ -0,0 +1,24 @@
|
|||
---
|
||||
sidebar_label: 'Create Your First Project'
|
||||
sidebar_position: 2
|
||||
---
|
||||
|
||||
# Create Your First Project
|
||||
|
||||
## 1. Create New Project
|
||||
|
||||
The platform provides a "New" button that allows users to quickly create a new public or private project from scratch.
|
||||
|
||||

|
||||
|
||||
## 2. Fill in Project Information
|
||||
|
||||
Fill in the basic project information.
|
||||
|
||||

|
||||
|
||||
## 3. Creation Successful
|
||||
|
||||
Click create project, and upon successful creation, you will be directed to the project homepage.
|
||||
|
||||

|
||||
|
|
@ -0,0 +1,92 @@
|
|||
---
|
||||
sidebar_label: 'Import Third-party Git Projects'
|
||||
sidebar_position: 5
|
||||
---
|
||||
|
||||
# Import Third-party Git Projects (GitHub, etc.)
|
||||
|
||||
## 1. Import Project
|
||||
|
||||
Select **Import Project** on the homepage
|
||||
|
||||

|
||||
|
||||
## 2. Fill in Information
|
||||
|
||||
Enter the third-party Git project URL and project information. If importing a private repository, you'll need to enter the target platform's user token for authorization.
|
||||
|
||||

|
||||
|
||||
## 3. Authorization Verification
|
||||
|
||||
When importing open-source projects from other platforms (like GitHub, Gitee) using GitLink, if the project is private, you cannot import it through normal means. You'll need to enter a valid token from the corresponding platform for verification.
|
||||
|
||||

|
||||
|
||||
Below are token acquisition methods for some typical open-source platforms.
|
||||
|
||||
### Getting a GitHub Token
|
||||
|
||||
1. Log in to your GitHub account
|
||||
|
||||
2. Access the settings menu under your profile picture
|
||||
|
||||
|
||||
|
||||
3. Access Developer settings at the bottom
|
||||
|
||||
|
||||
|
||||
4. On the redirected page, access Token (classic) and create a new classic token (if you haven't saved one)
|
||||
|
||||
|
||||
|
||||
5. On the token configuration page, enter the token's purpose and ensure the "repo" option is checked, otherwise the import will fail
|
||||
|
||||
|
||||
|
||||
Click the create button
|
||||
|
||||
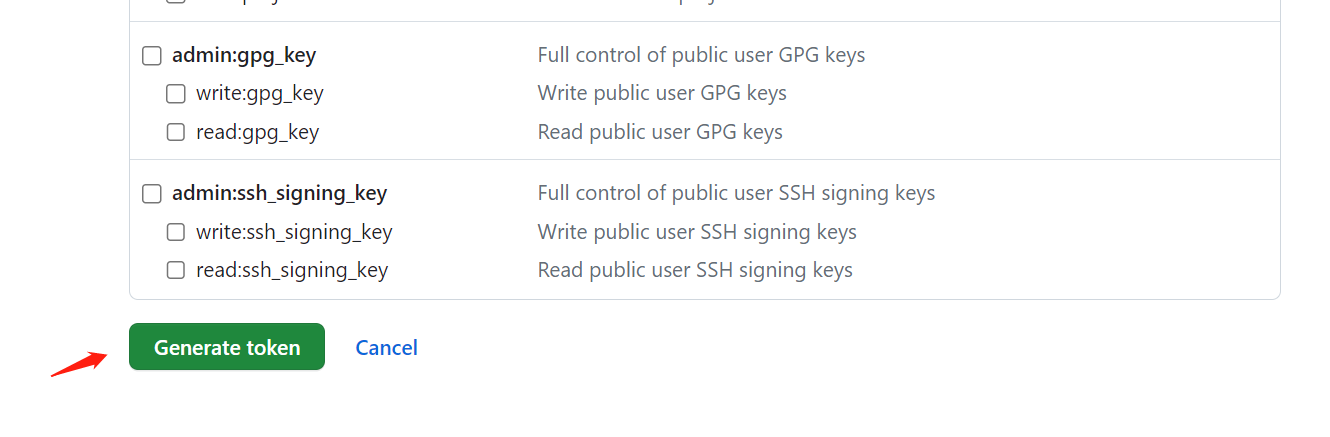
|
||||
|
||||
6. Copy the token
|
||||
|
||||
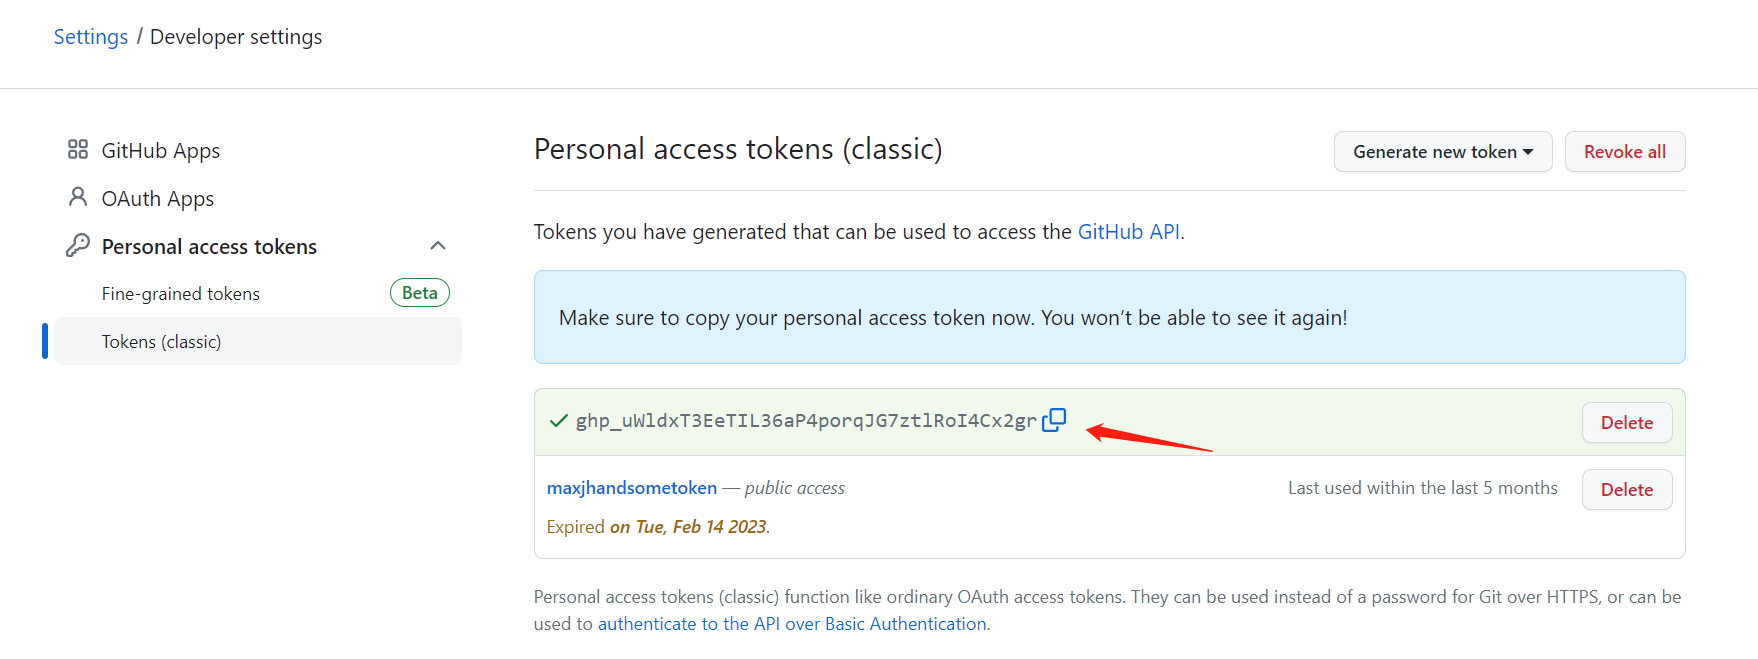
|
||||
|
||||
And enter it in the GitLink project import authentication field
|
||||
|
||||

|
||||
|
||||
### Getting a Gitee Token
|
||||
|
||||
1. Log in to your Gitee account
|
||||
|
||||
2. Access the settings menu under your profile picture
|
||||
|
||||
|
||||
|
||||
3. Access "Private Token" under "Security Settings"
|
||||
|
||||
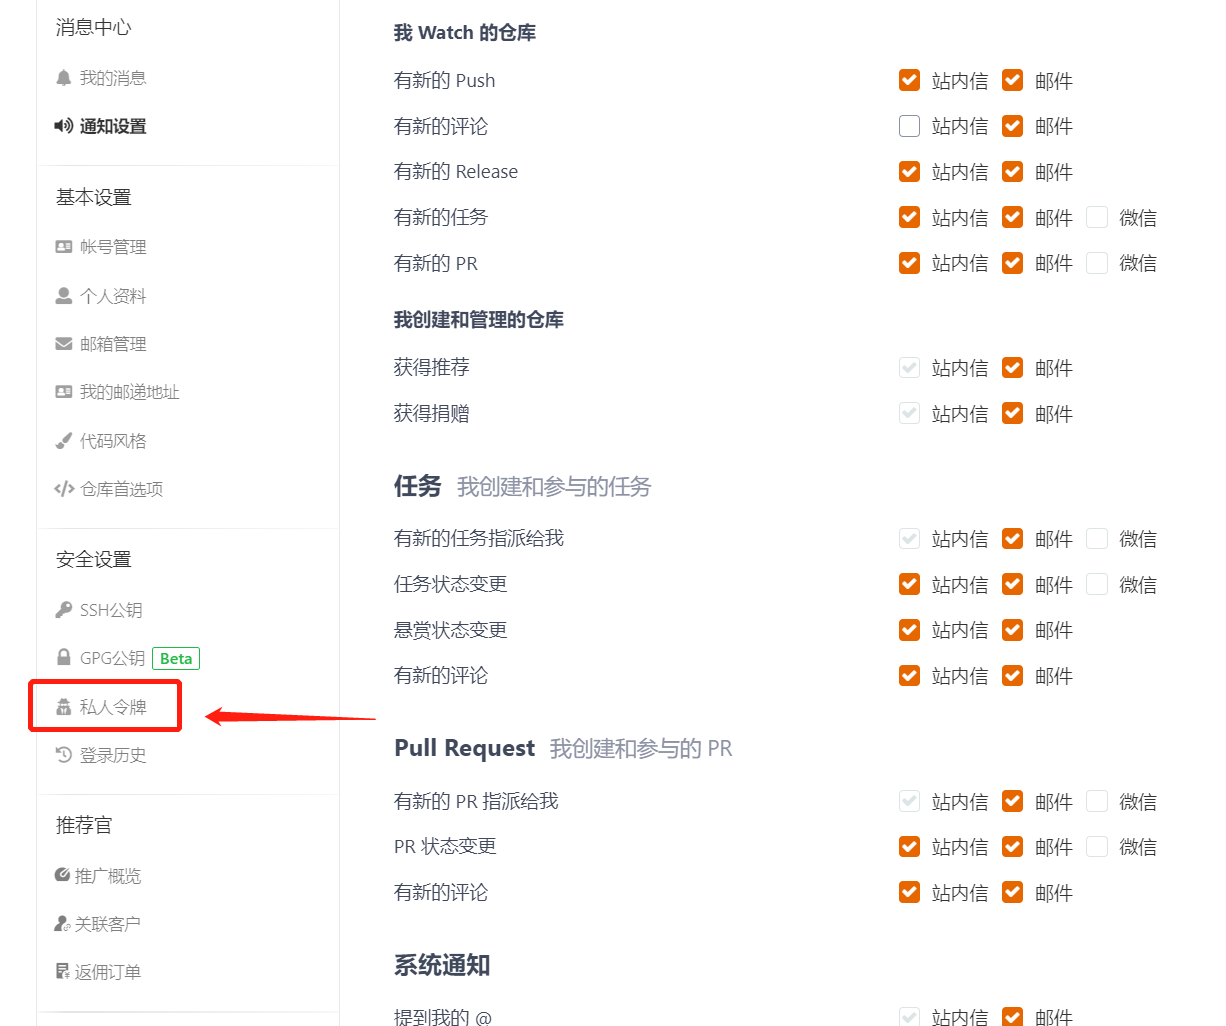
|
||||
|
||||
4. Click generate new token, configure the token name on the generation page, ensure the "project" permission is checked, and save the token
|
||||
|
||||
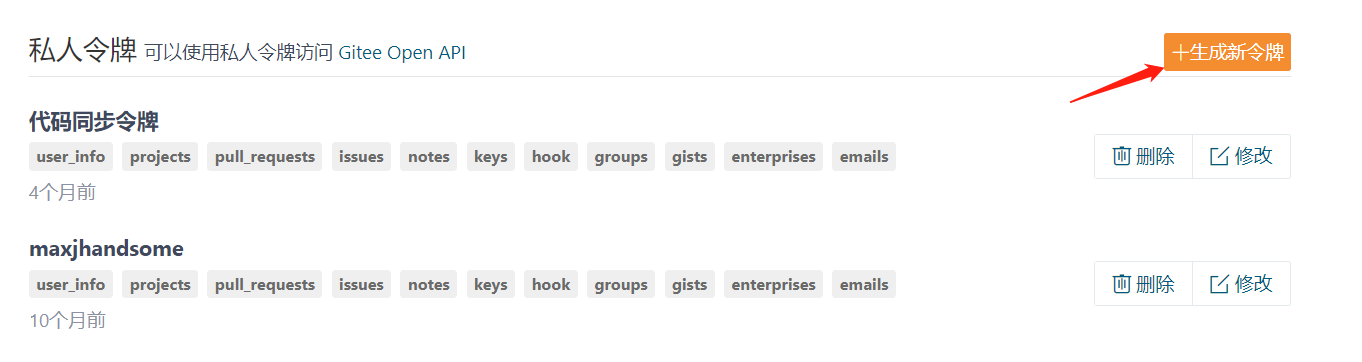
|
||||
|
||||
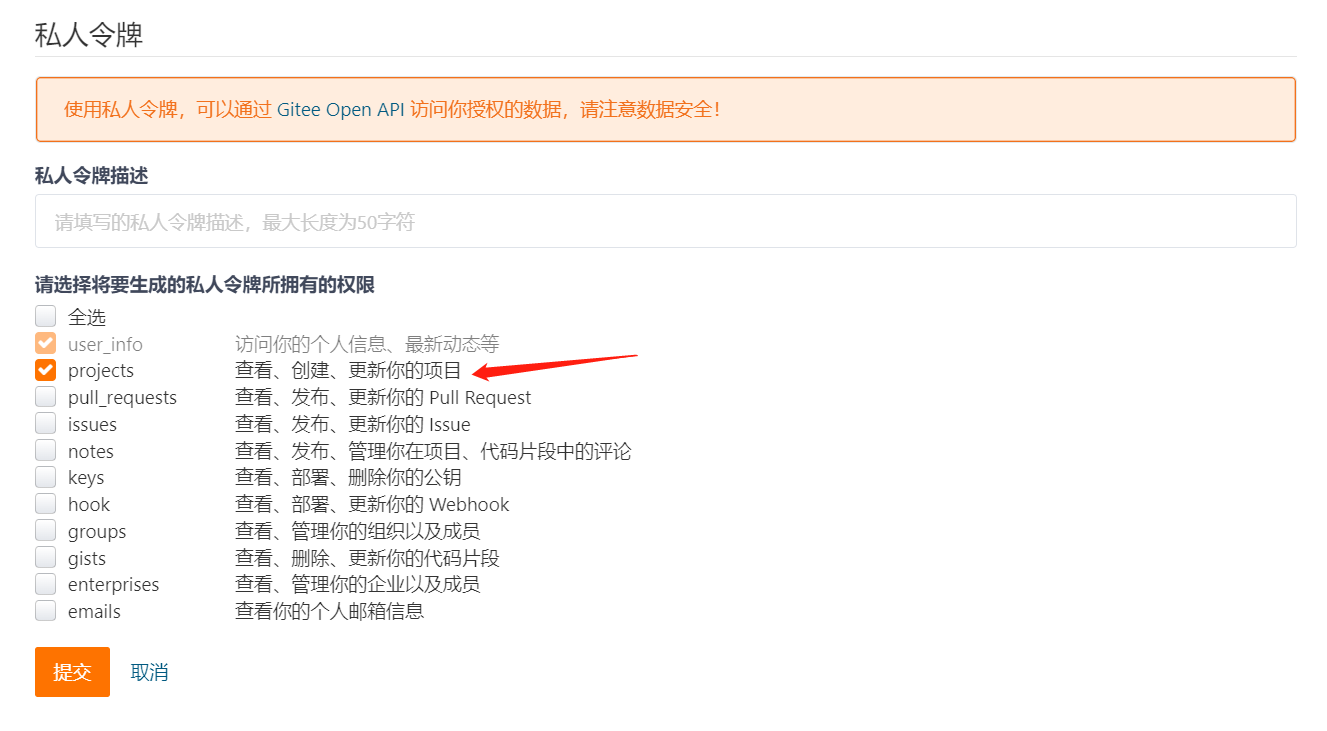
|
||||
|
||||
5. In the token generation success popup, copy the token and enter it in the GitLink project import authentication field
|
||||
|
||||
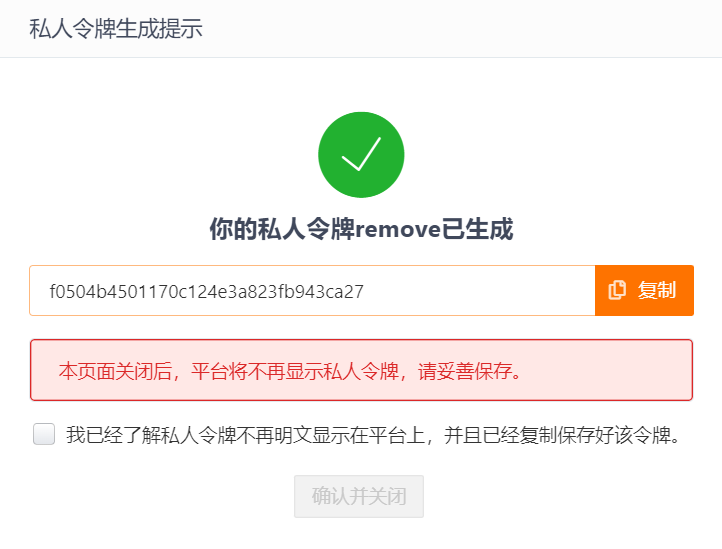
|
||||
|
||||
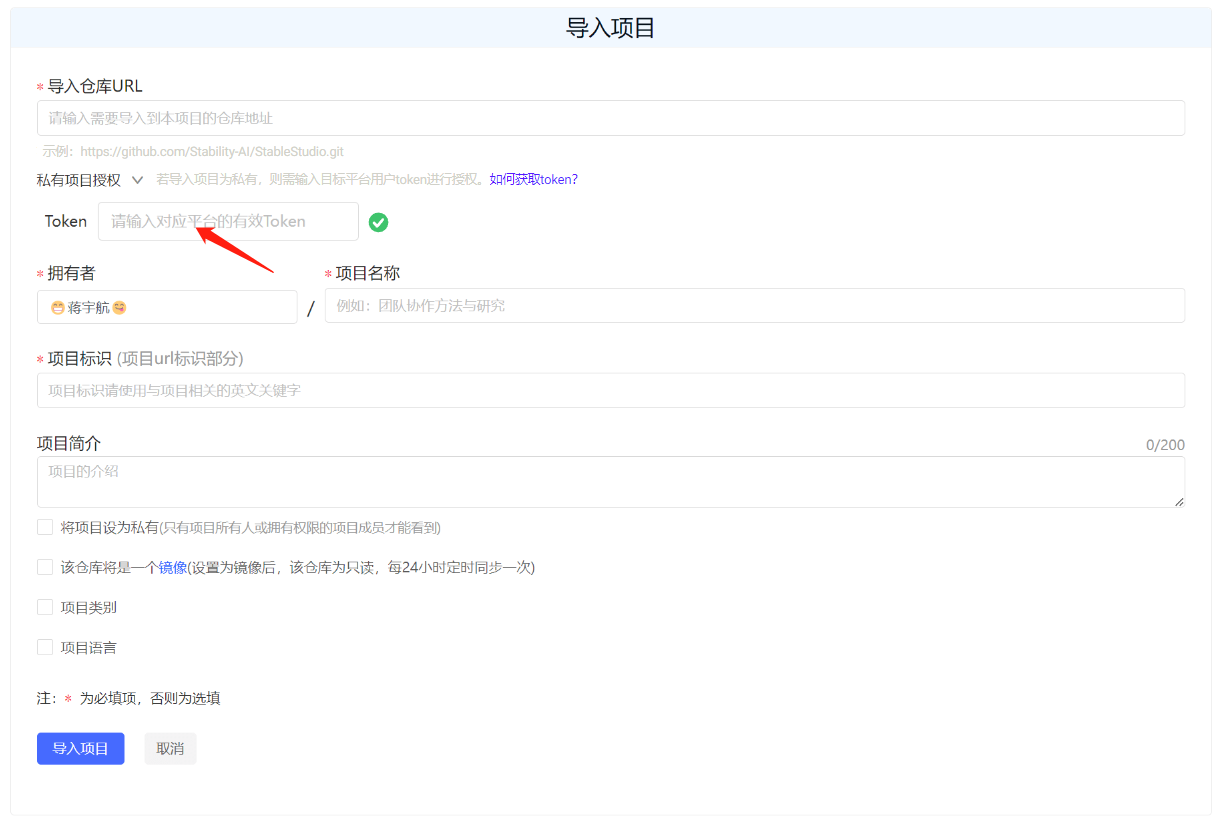
|
||||
|
||||
## 4. Import Successful
|
||||
|
||||
You'll see a message indicating migration from the third-party Git project URL is in progress
|
||||
|
||||

|
||||
|
||||
Once migration is complete, the project import is successful
|
||||
|
||||

|
||||
|
|
@ -0,0 +1,92 @@
|
|||
---
|
||||
sidebar_label: 'Import Projects from GitHub and Other Git Platforms'
|
||||
sidebar_position: 5
|
||||
---
|
||||
|
||||
# Import Projects from GitHub and Other Git Platforms
|
||||
|
||||
## 1. Import Project
|
||||
|
||||
Select **Import Project** on the homepage
|
||||
|
||||

|
||||
|
||||
## 2. Fill in Information
|
||||
|
||||
Enter the third-party Git project URL and project information. If you're importing a private repository, you'll need to enter the target platform's user token for authorization.
|
||||
|
||||

|
||||
|
||||
## 3. Authorization Verification
|
||||
|
||||
When importing open source projects from other platforms (such as GitHub, Gitee) to GitLink, if the project is private, you cannot import it through normal means. You'll need to enter a valid token from the corresponding platform for verification.
|
||||
|
||||

|
||||
|
||||
Below are the token acquisition methods for some typical open source platforms.
|
||||
|
||||
### Getting a GitHub Token
|
||||
|
||||
1. Log in to your GitHub account
|
||||
|
||||
2. Access the settings menu under your user avatar
|
||||
|
||||

|
||||
|
||||
3. Access Developer settings at the bottom
|
||||
|
||||

|
||||
|
||||
4. On the redirected page, access Token (classic) and create a new classic token (if you haven't saved one)
|
||||
|
||||

|
||||
|
||||
5. On the token configuration page, enter the token's purpose and ensure the "repo" option is checked, otherwise the import will fail
|
||||
|
||||

|
||||
|
||||
Click the create button
|
||||
|
||||

|
||||
|
||||
6. Copy the token
|
||||
|
||||

|
||||
|
||||
And enter it in the GitLink project import authentication field
|
||||
|
||||

|
||||
|
||||
### Getting a Gitee Token
|
||||
|
||||
1. Log in to your Gitee account
|
||||
|
||||
2. Access the settings menu under your user avatar
|
||||
|
||||

|
||||
|
||||
3. Access the "Personal Access Tokens" menu under "Security Settings"
|
||||
|
||||

|
||||
|
||||
4. Click generate new token, configure the token name on the generation page, ensure the "project" permission is checked, and save the token
|
||||
|
||||

|
||||
|
||||

|
||||
|
||||
5. In the token generation success popup, copy the token and enter it in the GitLink project import authentication field
|
||||
|
||||

|
||||
|
||||

|
||||
|
||||
## 4. Import Successful
|
||||
|
||||
You'll see a message indicating migration from the third-party Git project URL is in progress
|
||||
|
||||

|
||||
|
||||
When migration is complete, the project import is successful
|
||||
|
||||

|
||||
|
|
@ -0,0 +1,26 @@
|
|||
---
|
||||
sidebar_label: 'Register GitLink Account'
|
||||
sidebar_position: 1
|
||||
---
|
||||
|
||||
# Register GitLink Account
|
||||
|
||||
## 1. Click the **Register Now** button
|
||||
|
||||

|
||||
|
||||
## 2. Fill in Registration Information
|
||||
|
||||
- Register with Phone Number
|
||||
|
||||

|
||||
|
||||
- Register with Email
|
||||
|
||||

|
||||
|
||||
## 3. Registration Complete
|
||||
|
||||
After filling in the required information, click register. Upon successful registration, you will be directed to your personal homepage.
|
||||
|
||||

|
||||
|
|
@ -0,0 +1,73 @@
|
|||
---
|
||||
sidebar_label: 'Register GitLink Account'
|
||||
sidebar_position: 1
|
||||
---
|
||||
|
||||
# Register GitLink Account
|
||||
|
||||
## 1. Click the **Register Now** Button
|
||||
|
||||

|
||||
|
||||
## 2. Fill in Registration Information
|
||||
|
||||
- Register with Phone Number
|
||||
|
||||

|
||||
|
||||
- Register with Email
|
||||
|
||||

|
||||
|
||||
## 3. Registration Complete
|
||||
|
||||
After filling in the required information, click register. Upon successful registration, you will be directed to your personal homepage.
|
||||
|
||||

|
||||
|
||||
GitLink provides multiple registration methods to help you quickly become a member of our open-source community.
|
||||
|
||||
## Registration Methods
|
||||
|
||||
1. **Email Registration**
|
||||
- Visit [GitLink Official Website](https://www.gitlink.org.cn)
|
||||
- Click the "Register" button in the top right corner
|
||||
- Fill in your email address and password
|
||||
- Complete the verification process
|
||||
- Set your username and complete registration
|
||||
|
||||
2. **GitHub Account Login**
|
||||
- Click "Login with GitHub"
|
||||
- Authorize GitLink to access your GitHub account
|
||||
- Complete the additional information if required
|
||||
|
||||
3. **WeChat Login**
|
||||
- Scan the QR code with WeChat
|
||||
- Authorize the login request
|
||||
- Complete your profile information
|
||||
|
||||
## After Registration
|
||||
|
||||
After successful registration, you can:
|
||||
|
||||
1. Create your personal profile
|
||||
2. Start or join open source projects
|
||||
3. Participate in community discussions
|
||||
4. Follow other developers and projects
|
||||
|
||||
## Account Security
|
||||
|
||||
To ensure your account security:
|
||||
|
||||
- Use a strong password
|
||||
- Enable two-factor authentication if available
|
||||
- Keep your email address up to date
|
||||
- Never share your account credentials
|
||||
|
||||
## Need Help?
|
||||
|
||||
If you encounter any issues during registration, please:
|
||||
|
||||
1. Check our [FAQ section](/faq)
|
||||
2. Contact us through [Feedback](/feedback)
|
||||
3. Email us at gitlink@ccf.org.cn
|
||||
|
|
@ -0,0 +1 @@
|
|||
|
||||
|
|
@ -0,0 +1,44 @@
|
|||
---
|
||||
sidebar_label: 'Search Open Source Projects'
|
||||
sidebar_position: 4
|
||||
---
|
||||
|
||||
# Search Open Source Projects
|
||||
|
||||
## 1. Open Source Project Page Overview
|
||||
|
||||
The "Projects" module aggregates and manages all hosted projects and mirrored projects on the GitLink platform. Users can search projects by entering project name keywords or filter projects by categories.
|
||||
|
||||
In the "Projects" module, project types and categories are listed on the left side. Project types mainly include open source hosted projects and open source mirrored projects. Project categories include: Cloud Computing, Big Data, Blockchain, IoT, Machine Learning, Artificial Intelligence, Smart Healthcare, and Others.
|
||||
|
||||

|
||||
|
||||
The right side displays basic information for all projects, including creator, project name, project description, view count, project category, update time, likes, and fork count. Users can search for specific projects using keywords and sort projects by update time, creation time, fork count, or number of likes.
|
||||
|
||||

|
||||
|
||||
Users can click on a project name to enter the project details page, where they can view and participate in open source project development.
|
||||
|
||||
## 2. Search Open Source Projects
|
||||
|
||||
There are two search options available
|
||||
|
||||
### Open Source Project Search Box
|
||||
|
||||
Search for projects:
|
||||
|
||||

|
||||
|
||||
Search results:
|
||||
|
||||

|
||||
|
||||
### Menu Bar Search Box
|
||||
|
||||
Search for projects:
|
||||
|
||||

|
||||
|
||||
Search results:
|
||||
|
||||

|
||||
|
|
@ -0,0 +1,24 @@
|
|||
---
|
||||
sidebar_label: 'Submit Your First Code'
|
||||
sidebar_position: 3
|
||||
---
|
||||
|
||||
# Submit Your First Code
|
||||
|
||||
# 1. Edit Code
|
||||
|
||||
Click the edit button to start editing your code.
|
||||
|
||||

|
||||
|
||||
# 2. Submit Code
|
||||
|
||||
Write your code in the editor, then fill in the change description and submit your changes.
|
||||
|
||||

|
||||
|
||||
## 3. Code Update Successful
|
||||
|
||||
After successful submission, your code will be updated.
|
||||
|
||||

|
||||
|
|
@ -0,0 +1,7 @@
|
|||
{
|
||||
"label": "Repository Management",
|
||||
"position": 3,
|
||||
"link": {
|
||||
"type": "generated-index"
|
||||
}
|
||||
}
|
||||
|
|
@ -0,0 +1,14 @@
|
|||
---
|
||||
sidebar_label: 'Branch Management'
|
||||
sidebar_position: 5
|
||||
---
|
||||
|
||||
### **1. View Branches**
|
||||
Under the repository tab, as shown below, users can click on the repository branch to view all branches of the current project and choose to perform operations on them.
|
||||
<br/>
|
||||
|
||||
### **2. Merge Branches**
|
||||
Click "New Pull Request" under "Pull Requests (PR)",
|
||||
<br/>
|
||||
As shown below, users can select the source and target branches, fill in the branch information, and submit a merge request.
|
||||
<br/>
|
||||
|
|
@ -0,0 +1,12 @@
|
|||
---
|
||||
sidebar_label: 'Code Commit'
|
||||
sidebar_position: 3
|
||||
---
|
||||
|
||||
### **1. Code Commit Entry**
|
||||
Users can upload files through the "Upload Files" button in the files section of the project repository.
|
||||
<br/>
|
||||
|
||||
### **2. Upload Files**
|
||||
After entering the file upload page, as shown below, drag files, select the branch for committing changes, and click the "Create Project" button to complete the creation.
|
||||
<br/>
|
||||
|
|
@ -0,0 +1,12 @@
|
|||
---
|
||||
sidebar_label: 'Code Submission'
|
||||
sidebar_position: 3
|
||||
---
|
||||
|
||||
### **1. Code Submission Entry**
|
||||
Users can upload files through the "Upload Files" button in the files section of the project repository.
|
||||
<br/>
|
||||
|
||||
### **2. Upload Files**
|
||||
After entering the file upload page, as shown below, drag files, select the branch for committing changes, and click the "Create Project" button to complete the creation.
|
||||
<br/>
|
||||
|
|
@ -0,0 +1,12 @@
|
|||
---
|
||||
sidebar_label: 'Create Repository'
|
||||
sidebar_position: 1
|
||||
---
|
||||
|
||||
### **1. Repository Creation Entry**
|
||||
Users can create repositories through the button in the top-right corner of the platform homepage or the "New" button in the Projects module on their personal homepage.
|
||||
<br/>
|
||||
|
||||
### **2. Fill in Basic Project Information**
|
||||
After entering the new project page, as shown below, fill in the owner, project name, project identifier, and other information. Click the "Create Project" button to complete the creation.
|
||||
<br/>
|
||||
|
|
@ -0,0 +1,66 @@
|
|||
---
|
||||
sidebar_label: "Create Repository"
|
||||
title: "Create Repository"
|
||||
---
|
||||
|
||||
# Create Repository
|
||||
|
||||
Learn how to create and manage your repositories on GitLink.
|
||||
|
||||
## Creating a New Repository
|
||||
|
||||
1. **From Dashboard**
|
||||
- Click the "+" button in the top navigation bar
|
||||
- Select "New Repository"
|
||||
- Fill in the repository information:
|
||||
- Repository name
|
||||
- Description (optional)
|
||||
- Visibility (Public/Private)
|
||||
- Initialize with README
|
||||
- Choose license (optional)
|
||||
- Add .gitignore (optional)
|
||||
|
||||
2. **Repository Settings**
|
||||
- Basic information
|
||||
- Access control
|
||||
- Branch protection
|
||||
- Webhooks
|
||||
- Deploy keys
|
||||
|
||||
## Best Practices
|
||||
|
||||
1. **Repository Name**
|
||||
- Use meaningful names
|
||||
- Avoid special characters
|
||||
- Keep it concise but descriptive
|
||||
|
||||
2. **Description**
|
||||
- Clearly explain the purpose
|
||||
- List main features
|
||||
- Include status badges
|
||||
|
||||
3. **README.md**
|
||||
- Project introduction
|
||||
- Installation instructions
|
||||
- Usage examples
|
||||
- Contribution guidelines
|
||||
|
||||
## Repository Management
|
||||
|
||||
1. **Access Control**
|
||||
- Public vs Private visibility
|
||||
- Collaborator management
|
||||
- Role assignments
|
||||
|
||||
2. **Branch Protection**
|
||||
- Protected branches
|
||||
- Merge requirements
|
||||
- Code review policies
|
||||
|
||||
## Need Help?
|
||||
|
||||
If you need assistance with repository creation or management:
|
||||
|
||||
1. Check our [documentation](/repository-management)
|
||||
2. Contact [support](/feedback)
|
||||
3. Join our community discussions
|
||||
|
|
@ -0,0 +1,20 @@
|
|||
---
|
||||
sidebar_label: 'File Management'
|
||||
sidebar_position: 4
|
||||
---
|
||||
|
||||
### **1. File Management Location**
|
||||
In the repository interface, you can directly operate on files under the current branch in the repository, as shown below.
|
||||
<br/>
|
||||
|
||||
### **2. Enter Directory**
|
||||
Click to enter the relevant directory and find the file you want to edit, as shown below.
|
||||
<br/>
|
||||
|
||||
### **3. Enter File Editing Page**
|
||||
To edit a file online, click on the file to enter the file editing page, as shown below.
|
||||
<br/>
|
||||
|
||||
### **4. Edit File**
|
||||
There are three buttons on the right side of the editing interface: "Download", "Edit", and "Delete". Click download to download the file to your local machine, edit to modify the document online, and delete to remove the file from the repository. The button locations are shown below.
|
||||
<br/>
|
||||
|
|
@ -0,0 +1,24 @@
|
|||
---
|
||||
sidebar_label: 'Member Management'
|
||||
sidebar_position: 7
|
||||
---
|
||||
|
||||
### **1. Member Management Entry**
|
||||
On the repository homepage, click the "Repository Settings" button, then click "Member Management" to enter the member management module, as shown below.
|
||||
<br/>
|
||||
|
||||
### **2. Filter and Search Project Members**
|
||||
After entering the member management module, you can use the "Role Filter" button to filter project member types and use the "Search" button to search for specific project members, as shown below.
|
||||
<br/>
|
||||
|
||||
### **3. Add Project Members**
|
||||
After entering the member management module, you can add project members through the "Add Member" button. Search for specific users in the left search box, select them, and click the "Add Member" button to successfully add project members.
|
||||
<br/>
|
||||
|
||||
### **4. Project Member Permission Management**
|
||||
After entering the member management module, click the role column on the right side of a project member to select the permission level to grant to that project member, as shown below.
|
||||
<br/>
|
||||
|
||||
### **5. Delete Project Members**
|
||||
After entering the member management module, click the "Delete" button on the right side of a project member to remove them from the project, as shown below.
|
||||
<br/>
|
||||
|
|
@ -0,0 +1,12 @@
|
|||
---
|
||||
sidebar_label: 'Repository Settings'
|
||||
sidebar_position: 2
|
||||
---
|
||||
|
||||
### **1. Repository Settings Entry**
|
||||
On the repository homepage, click the "Repository Settings" button to enter the repository settings module. In repository settings, you can modify basic project information, manage members, configure webhooks, set up branches, and install bots.
|
||||
<br/>
|
||||
|
||||
### **2. Basic Settings**
|
||||
After entering the repository settings module, click the "Basic Settings" button to access the basic settings module. As shown below, you can modify basic project information such as project name, project identifier, project description, project category, and project language. Click the "Transfer" button to transfer the repository to other users or organizations, and click the "Delete Repository" button to delete this repository.
|
||||
<br/>
|
||||
|
|
@ -0,0 +1,29 @@
|
|||
---
|
||||
sidebar_label: 'Tags and Releases'
|
||||
sidebar_position: 6
|
||||
---
|
||||
|
||||
### **1. Tags and Releases Management Entry**
|
||||
On the repository homepage, click the "Repository" button, then click "Tags" to enter the tags and releases management module, as shown below.
|
||||
<br/>
|
||||
|
||||
### **2. Delete Tags**
|
||||
After entering the tags and releases management module, click the "Delete" button on the right side of a tag to delete it, as shown below.
|
||||
<br/>
|
||||
|
||||
### **3. View Releases**
|
||||
After entering the tags and releases management module, click the "Releases" button to view project releases, as shown below.
|
||||
<br/>
|
||||
|
||||
### **4. Create Release**
|
||||
After entering the tags and releases management module, click the "Create Release" button on the right side of a tag to quickly create a release bound to that tag, as shown below.
|
||||
<br/>
|
||||
|
||||
### **5. Modify Release**
|
||||
After entering the tags and releases management module, click the modify button on the right side of a release to enter the release modification page, as shown below. After completing the release modifications, click the "Save Release" button to save the changes.
|
||||
<br/>
|
||||
<br/>
|
||||
|
||||
### **6. Delete Release**
|
||||
After entering the tags and releases management module, click the delete button on the right side of a release to enter the release deletion page, as shown below.
|
||||
<br/>
|
||||
|
|
@ -0,0 +1,38 @@
|
|||
---
|
||||
sidebar_label: 'Webhook'
|
||||
sidebar_position: 8
|
||||
---
|
||||
|
||||
### **1. Webhook Module Entry**
|
||||
On the project homepage, click the "Repository Settings" button, then click the "Webhooks" button to enter the repository's Webhook module.
|
||||
<br/>
|
||||
|
||||
### **2. Add Webhook**
|
||||
Click the "Add Webhook" button to enter the Webhook configuration page:
|
||||
|
||||
<br/>
|
||||
<br/>
|
||||
|
||||
### **3. Edit Webhook**
|
||||
After adding a Webhook, as shown below, you can edit each Webhook by clicking the "Edit" button on the right side.
|
||||
|
||||
<br/>
|
||||
|
||||
### **4. Delete Webhook**
|
||||
After adding a Webhook, as shown below, you can delete each Webhook by clicking the "Delete" button on the right side.
|
||||
|
||||
<br/>
|
||||
|
||||
### **5. Supported Event Types for Webhooks**
|
||||
In GitLink, the following event types are supported for Webhooks:
|
||||
- Push: Git push to repository
|
||||
- Repository: Create or delete repository
|
||||
- Create: Create branch or tag
|
||||
- Delete: Delete branch or tag
|
||||
- Pull Request: Pull request opened, closed, reopened, or edited
|
||||
- Pull Request Assignment: Pull request assigned or unassigned
|
||||
- Pull Request Milestone: Pull request added to or removed from milestone
|
||||
- Pull Request Comment: Pull request comment created, edited, or deleted
|
||||
- Pull Request Label: Pull request labels updated or cleared
|
||||
- Pull Request Review: Pull request approved, rejected, or review comments added, reviewer changes, review thread resolved or unresolved
|
||||
- Pull Request Sync: Pull request synchronized
|
||||
|
|
@ -0,0 +1,41 @@
|
|||
---
|
||||
sidebar_label: 'WebIDE'
|
||||
sidebar_position: 9
|
||||
---
|
||||
|
||||
### **1. Language Services**
|
||||
● Syntax highlighting support for nearly 40 programming languages
|
||||
● LSP (Language Server Protocol) based language features for JavaScript/TypeScript, HTML, CSS, JSON, and Markdown, providing intelligent suggestions, outline information, and in-file navigation
|
||||
● Tree Sitter based online language services for Java, Go, Python, C++, and PHP, offering features like reference lookup and symbol search
|
||||
|
||||
### **2. WebIDE Entry**
|
||||
Access WebIDE by clicking the Web IDE button from the Gitlink repository homepage
|
||||
<br/>
|
||||
|
||||
### **3. Branches**
|
||||
Branch switching support: Click the branch name in the bottom left corner to switch branches.
|
||||
<br/>
|
||||
|
||||
### **4. Search**
|
||||
Currently supports code search within Gitlink repositories (with word matching and file filtering) and file search.
|
||||
<br/>
|
||||
|
||||
### **5. Line Highlighting**
|
||||
Supports single or multiple line highlighting. Click line numbers to highlight lines, hold Shift to select multiple consecutive lines.
|
||||
<br/>
|
||||
|
||||
### **6. Blame**
|
||||
Supports viewing line-by-line blame information, hover to show detailed information.
|
||||
<br/>
|
||||
|
||||
### **7. Graph**
|
||||
Supports graph view to examine branch commit history and detailed file changes for each commit, with file diff viewing capability. Open Git Graph view by clicking Git Graph in the bottom left corner of the status bar or by typing "View Git Graph" in the command palette.
|
||||
<br/>
|
||||
|
||||
### **8. WebSCM**
|
||||
Create new branches in the lite version, view changed files list in the SCM panel after code modifications, and commit to Gitlink after writing commit messages. For quick file modifications, you can edit code directly through the lite version and commit all at once instead of modifying locally.
|
||||
|
||||
### **9. Online Code Execution**
|
||||
● Integrates a lighter CodeSwing plugin based on skypack for running frontend code in the lite version
|
||||
● Integrates Code-Runner-For-Web plugin based on Pyodide to run Python code in the browser
|
||||
<br/>
|
||||
|
|
@ -0,0 +1,112 @@
|
|||
---
|
||||
sidebar_label: "Terms of Service"
|
||||
title: "GitLink Terms of Service"
|
||||
---
|
||||
|
||||
# GitLink Terms of Service
|
||||
|
||||
This document outlines the terms and conditions for using GitLink's services.
|
||||
|
||||
## Service Agreement
|
||||
|
||||
1. **Acceptance of Terms**
|
||||
- By accessing GitLink
|
||||
- By using services
|
||||
- By creating account
|
||||
- By downloading content
|
||||
- By contributing content
|
||||
|
||||
2. **User Obligations**
|
||||
- Account security
|
||||
- Content responsibility
|
||||
- Proper usage
|
||||
- Legal compliance
|
||||
- Community guidelines
|
||||
|
||||
## User Rights and Responsibilities
|
||||
|
||||
1. **User Rights**
|
||||
- Access to services
|
||||
- Content ownership
|
||||
- Privacy protection
|
||||
- Data portability
|
||||
- Support services
|
||||
|
||||
2. **User Responsibilities**
|
||||
- Account management
|
||||
- Content guidelines
|
||||
- Code of conduct
|
||||
- Security practices
|
||||
- Reporting violations
|
||||
|
||||
## Service Provisions
|
||||
|
||||
1. **Service Availability**
|
||||
- Uptime commitment
|
||||
- Maintenance windows
|
||||
- Service updates
|
||||
- Emergency maintenance
|
||||
- Notifications
|
||||
|
||||
2. **Service Limitations**
|
||||
- Storage limits
|
||||
- Bandwidth restrictions
|
||||
- API rate limits
|
||||
- Feature availability
|
||||
- Usage quotas
|
||||
|
||||
## Privacy and Security
|
||||
|
||||
1. **Data Protection**
|
||||
- Information collection
|
||||
- Data usage
|
||||
- Security measures
|
||||
- Data retention
|
||||
- User privacy
|
||||
|
||||
2. **Security Measures**
|
||||
- Authentication
|
||||
- Encryption
|
||||
- Access controls
|
||||
- Monitoring
|
||||
- Incident response
|
||||
|
||||
## Intellectual Property
|
||||
|
||||
1. **Content Rights**
|
||||
- User content
|
||||
- Platform content
|
||||
- License terms
|
||||
- Usage rights
|
||||
- Restrictions
|
||||
|
||||
2. **License Terms**
|
||||
- Open source
|
||||
- Proprietary code
|
||||
- Content licensing
|
||||
- Distribution rights
|
||||
- Attribution
|
||||
|
||||
## Changes and Termination
|
||||
|
||||
1. **Agreement Changes**
|
||||
- Notice of changes
|
||||
- Acceptance terms
|
||||
- Implementation
|
||||
- User rights
|
||||
- Objection process
|
||||
|
||||
2. **Account Termination**
|
||||
- Termination reasons
|
||||
- Notice period
|
||||
- Data retention
|
||||
- Appeal process
|
||||
- Data export
|
||||
|
||||
## Contact Information
|
||||
|
||||
For questions about these terms:
|
||||
|
||||
1. Email: gitlink@ccf.org.cn
|
||||
2. Visit: [Support Center](/feedback)
|
||||
3. Legal Department: legal@gitlink.org.cn
|
||||
|
|
@ -0,0 +1,104 @@
|
|||
---
|
||||
sidebar_label: "Code Synchronization"
|
||||
title: "Cross-Platform Code Synchronization"
|
||||
---
|
||||
|
||||
# Cross-Platform Code Synchronization
|
||||
|
||||
Learn how to synchronize your code between GitLink and other popular platforms.
|
||||
|
||||
## Supported Platforms
|
||||
|
||||
1. **Version Control Platforms**
|
||||
- GitHub
|
||||
- GitLab
|
||||
- Bitbucket
|
||||
- Gitee
|
||||
- Custom Git servers
|
||||
|
||||
2. **Integration Types**
|
||||
- One-way sync
|
||||
- Two-way sync
|
||||
- Mirror repositories
|
||||
- Branch-specific sync
|
||||
|
||||
## Setup Process
|
||||
|
||||
1. **Prerequisites**
|
||||
- Platform accounts
|
||||
- Access tokens
|
||||
- Repository permissions
|
||||
- SSH keys (if required)
|
||||
|
||||
2. **Configuration Steps**
|
||||
- Connect platforms
|
||||
- Select repositories
|
||||
- Choose sync direction
|
||||
- Set up schedules
|
||||
- Configure branches
|
||||
|
||||
## Sync Options
|
||||
|
||||
1. **Basic Settings**
|
||||
- Repository selection
|
||||
- Branch mapping
|
||||
- Update frequency
|
||||
- Conflict resolution
|
||||
- Error handling
|
||||
|
||||
2. **Advanced Features**
|
||||
- Custom webhooks
|
||||
- Event filtering
|
||||
- Transformation rules
|
||||
- Access control
|
||||
- Audit logging
|
||||
|
||||
## Best Practices
|
||||
|
||||
1. **Security**
|
||||
- Token management
|
||||
- Permission scoping
|
||||
- Regular audits
|
||||
- Access reviews
|
||||
|
||||
2. **Performance**
|
||||
- Optimize sync frequency
|
||||
- Manage repository size
|
||||
- Monitor bandwidth
|
||||
- Handle large files
|
||||
|
||||
## Common Use Cases
|
||||
|
||||
1. **Project Migration**
|
||||
- Platform transition
|
||||
- Repository backup
|
||||
- Code distribution
|
||||
- Archive creation
|
||||
|
||||
2. **Collaboration**
|
||||
- Multi-platform teams
|
||||
- Open source projects
|
||||
- Enterprise integration
|
||||
- Vendor management
|
||||
|
||||
## Troubleshooting
|
||||
|
||||
1. **Common Issues**
|
||||
- Authentication errors
|
||||
- Sync conflicts
|
||||
- Permission problems
|
||||
- Network issues
|
||||
|
||||
2. **Resolution Steps**
|
||||
- Check credentials
|
||||
- Verify permissions
|
||||
- Review logs
|
||||
- Contact support
|
||||
|
||||
## Need Help?
|
||||
|
||||
For assistance with code synchronization:
|
||||
|
||||
1. Review [documentation](/third-party-services)
|
||||
2. Contact [support team](/feedback)
|
||||
3. Join community discussions
|
||||
|
|
@ -0,0 +1,7 @@
|
|||
{
|
||||
"label": "Wiki",
|
||||
"position": 7,
|
||||
"link": {
|
||||
"type": "generated-index"
|
||||
}
|
||||
}
|
||||
|
|
@ -0,0 +1,16 @@
|
|||
---
|
||||
sidebar_label: 'Template Import and Export'
|
||||
sidebar_position: 2
|
||||
---
|
||||
|
||||
# GitLink Help Center
|
||||
|
||||
## Template Import and Export Management
|
||||
|
||||
#### 1. Template Import
|
||||
Click the **Import Template** button on the Wiki interface to import local files in txt, markdown, and other formats to create Wiki documents. This feature is currently under development and testing
|
||||
[](/img/wiki/img4.png)
|
||||
|
||||
#### 2. Template Export
|
||||
This feature is currently under development and testing
|
||||
<br/>
|
||||
|
|
@ -0,0 +1,88 @@
|
|||
---
|
||||
sidebar_label: "Wiki Templates"
|
||||
title: "Wiki Templates and Management"
|
||||
---
|
||||
|
||||
# Wiki Templates and Management
|
||||
|
||||
Learn how to effectively use and manage Wiki templates in GitLink for better documentation.
|
||||
|
||||
## Wiki Basics
|
||||
|
||||
1. **What is Wiki?**
|
||||
- Project documentation
|
||||
- Knowledge base
|
||||
- Collaboration platform
|
||||
- Version control
|
||||
|
||||
2. **Wiki Features**
|
||||
- Markdown support
|
||||
- File attachments
|
||||
- Version history
|
||||
- Search functionality
|
||||
- Access control
|
||||
|
||||
## Template Management
|
||||
|
||||
1. **Using Templates**
|
||||
- Default templates
|
||||
- Custom templates
|
||||
- Template variables
|
||||
- Template inheritance
|
||||
|
||||
2. **Template Types**
|
||||
- Project overview
|
||||
- API documentation
|
||||
- User guides
|
||||
- Development guidelines
|
||||
- Release notes
|
||||
|
||||
## Best Practices
|
||||
|
||||
1. **Content Organization**
|
||||
- Clear structure
|
||||
- Consistent formatting
|
||||
- Regular updates
|
||||
- Proper categorization
|
||||
|
||||
2. **Writing Style**
|
||||
- Clear and concise
|
||||
- Proper headings
|
||||
- Code examples
|
||||
- Visual aids
|
||||
|
||||
## Import and Export
|
||||
|
||||
1. **Importing Templates**
|
||||
- Template selection
|
||||
- Content customization
|
||||
- Bulk import
|
||||
- Version control
|
||||
|
||||
2. **Exporting Content**
|
||||
- Format selection
|
||||
- Batch export
|
||||
- Backup creation
|
||||
- Version management
|
||||
|
||||
## Collaboration
|
||||
|
||||
1. **Access Control**
|
||||
- View permissions
|
||||
- Edit permissions
|
||||
- Admin rights
|
||||
- Group access
|
||||
|
||||
2. **Change Management**
|
||||
- Version tracking
|
||||
- Change history
|
||||
- Rollback options
|
||||
- Conflict resolution
|
||||
|
||||
## Need Help?
|
||||
|
||||
For assistance with Wiki templates:
|
||||
|
||||
1. Check our [Wiki documentation](/wiki)
|
||||
2. Contact [support team](/feedback)
|
||||
3. Join community discussions
|
||||
|
|
@ -0,0 +1,23 @@
|
|||
---
|
||||
sidebar_label: 'Wiki Page Management'
|
||||
sidebar_position: 1
|
||||
---
|
||||
|
||||
# GitLink Help Center
|
||||
|
||||
## Wiki Interface Management
|
||||
|
||||
#### 1. Wiki Interface
|
||||
GitLink projects have a dedicated **Wiki interface** to showcase project information
|
||||
[](/img/wiki/img1.png)
|
||||
|
||||
#### 2. Creating Wiki Content
|
||||
In the initialized Wiki interface, click either **Create Wiki Document** or **Import Template** to start editing Wiki documents
|
||||
<br/>
|
||||
|
||||
#### 3. Editing Wiki Documents
|
||||
Clicking **Create Wiki Document** will redirect you to the editing interface, starting with a blank document
|
||||
[](/img/wiki/img3.png)
|
||||
You can also import templates by checking the *Add Template* option. The platform provides templates for *Weekly Reports* and *Monthly Reports*
|
||||
[](/img/wiki/img2.png)
|
||||
After completing the edits, click save in the bottom left corner
|
||||
|
|
@ -0,0 +1,54 @@
|
|||
{
|
||||
"version.label": {
|
||||
"message": "1.1.0",
|
||||
"description": "The label for version 1.1.0"
|
||||
},
|
||||
"sidebar.defaultSidebar.category.快速开始": {
|
||||
"message": "快速开始",
|
||||
"description": "The label for category 快速开始 in sidebar defaultSidebar"
|
||||
},
|
||||
"sidebar.defaultSidebar.category.代码库管理": {
|
||||
"message": "代码库管理",
|
||||
"description": "The label for category 代码库管理 in sidebar defaultSidebar"
|
||||
},
|
||||
"sidebar.defaultSidebar.category.组织管理": {
|
||||
"message": "组织管理",
|
||||
"description": "The label for category 组织管理 in sidebar defaultSidebar"
|
||||
},
|
||||
"sidebar.defaultSidebar.category.疑修(Issue)": {
|
||||
"message": "疑修(Issue)",
|
||||
"description": "The label for category 疑修(Issue) in sidebar defaultSidebar"
|
||||
},
|
||||
"sidebar.defaultSidebar.category.合并请求(PR)": {
|
||||
"message": "合并请求(PR)",
|
||||
"description": "The label for category 合并请求(PR) in sidebar defaultSidebar"
|
||||
},
|
||||
"sidebar.defaultSidebar.category.DevOps引擎(Engine)": {
|
||||
"message": "DevOps引擎(Engine)",
|
||||
"description": "The label for category DevOps引擎(Engine) in sidebar defaultSidebar"
|
||||
},
|
||||
"sidebar.defaultSidebar.category.维基(Wiki)": {
|
||||
"message": "维基(Wiki)",
|
||||
"description": "The label for category 维基(Wiki) in sidebar defaultSidebar"
|
||||
},
|
||||
"sidebar.defaultSidebar.category.机器人(Bot)": {
|
||||
"message": "机器人(Bot)",
|
||||
"description": "The label for category 机器人(Bot) in sidebar defaultSidebar"
|
||||
},
|
||||
"sidebar.defaultSidebar.category.第三方服务": {
|
||||
"message": "第三方服务",
|
||||
"description": "The label for category 第三方服务 in sidebar defaultSidebar"
|
||||
},
|
||||
"sidebar.defaultSidebar.category.通知": {
|
||||
"message": "通知",
|
||||
"description": "The label for category 通知 in sidebar defaultSidebar"
|
||||
},
|
||||
"sidebar.defaultSidebar.category.个人主页建站": {
|
||||
"message": "个人主页建站",
|
||||
"description": "The label for category 个人主页建站 in sidebar defaultSidebar"
|
||||
},
|
||||
"sidebar.defaultSidebar.category.服务协议": {
|
||||
"message": "服务协议",
|
||||
"description": "The label for category 服务协议 in sidebar defaultSidebar"
|
||||
}
|
||||
}
|
||||
Some files were not shown because too many files have changed in this diff Show More
Loading…
Reference in New Issue